3 - Creating poles, conductors, components and assemblies
Learn how to create poles, conductors, components and constructions.

Written by Cody Yakimoff
Updated at August 14th, 2023
Table of Contents
The first step to modelling an existing network is to make sure that you have the right poles, conductors, components and constructions, created with the right characteristics. Neara makes it easy to create these to your design specifications.
This article will explain how to create poles, conductors, construction components and constructions themselves.
Creating poles
To quickly create one or more poles, add entries to the existing the Poles library data by editing the data in an app like Microsoft Excel. This ensures that you retain the correct column headings and information.
From the Library menu choose Poles and on the pop-up click the Export option to download the CSV poles file:
For easy editing, open the downloaded CSV file in an app like Microsoft Excel and insert new rows with a pole name and specifications beneath the column headings, for each additional pole type:
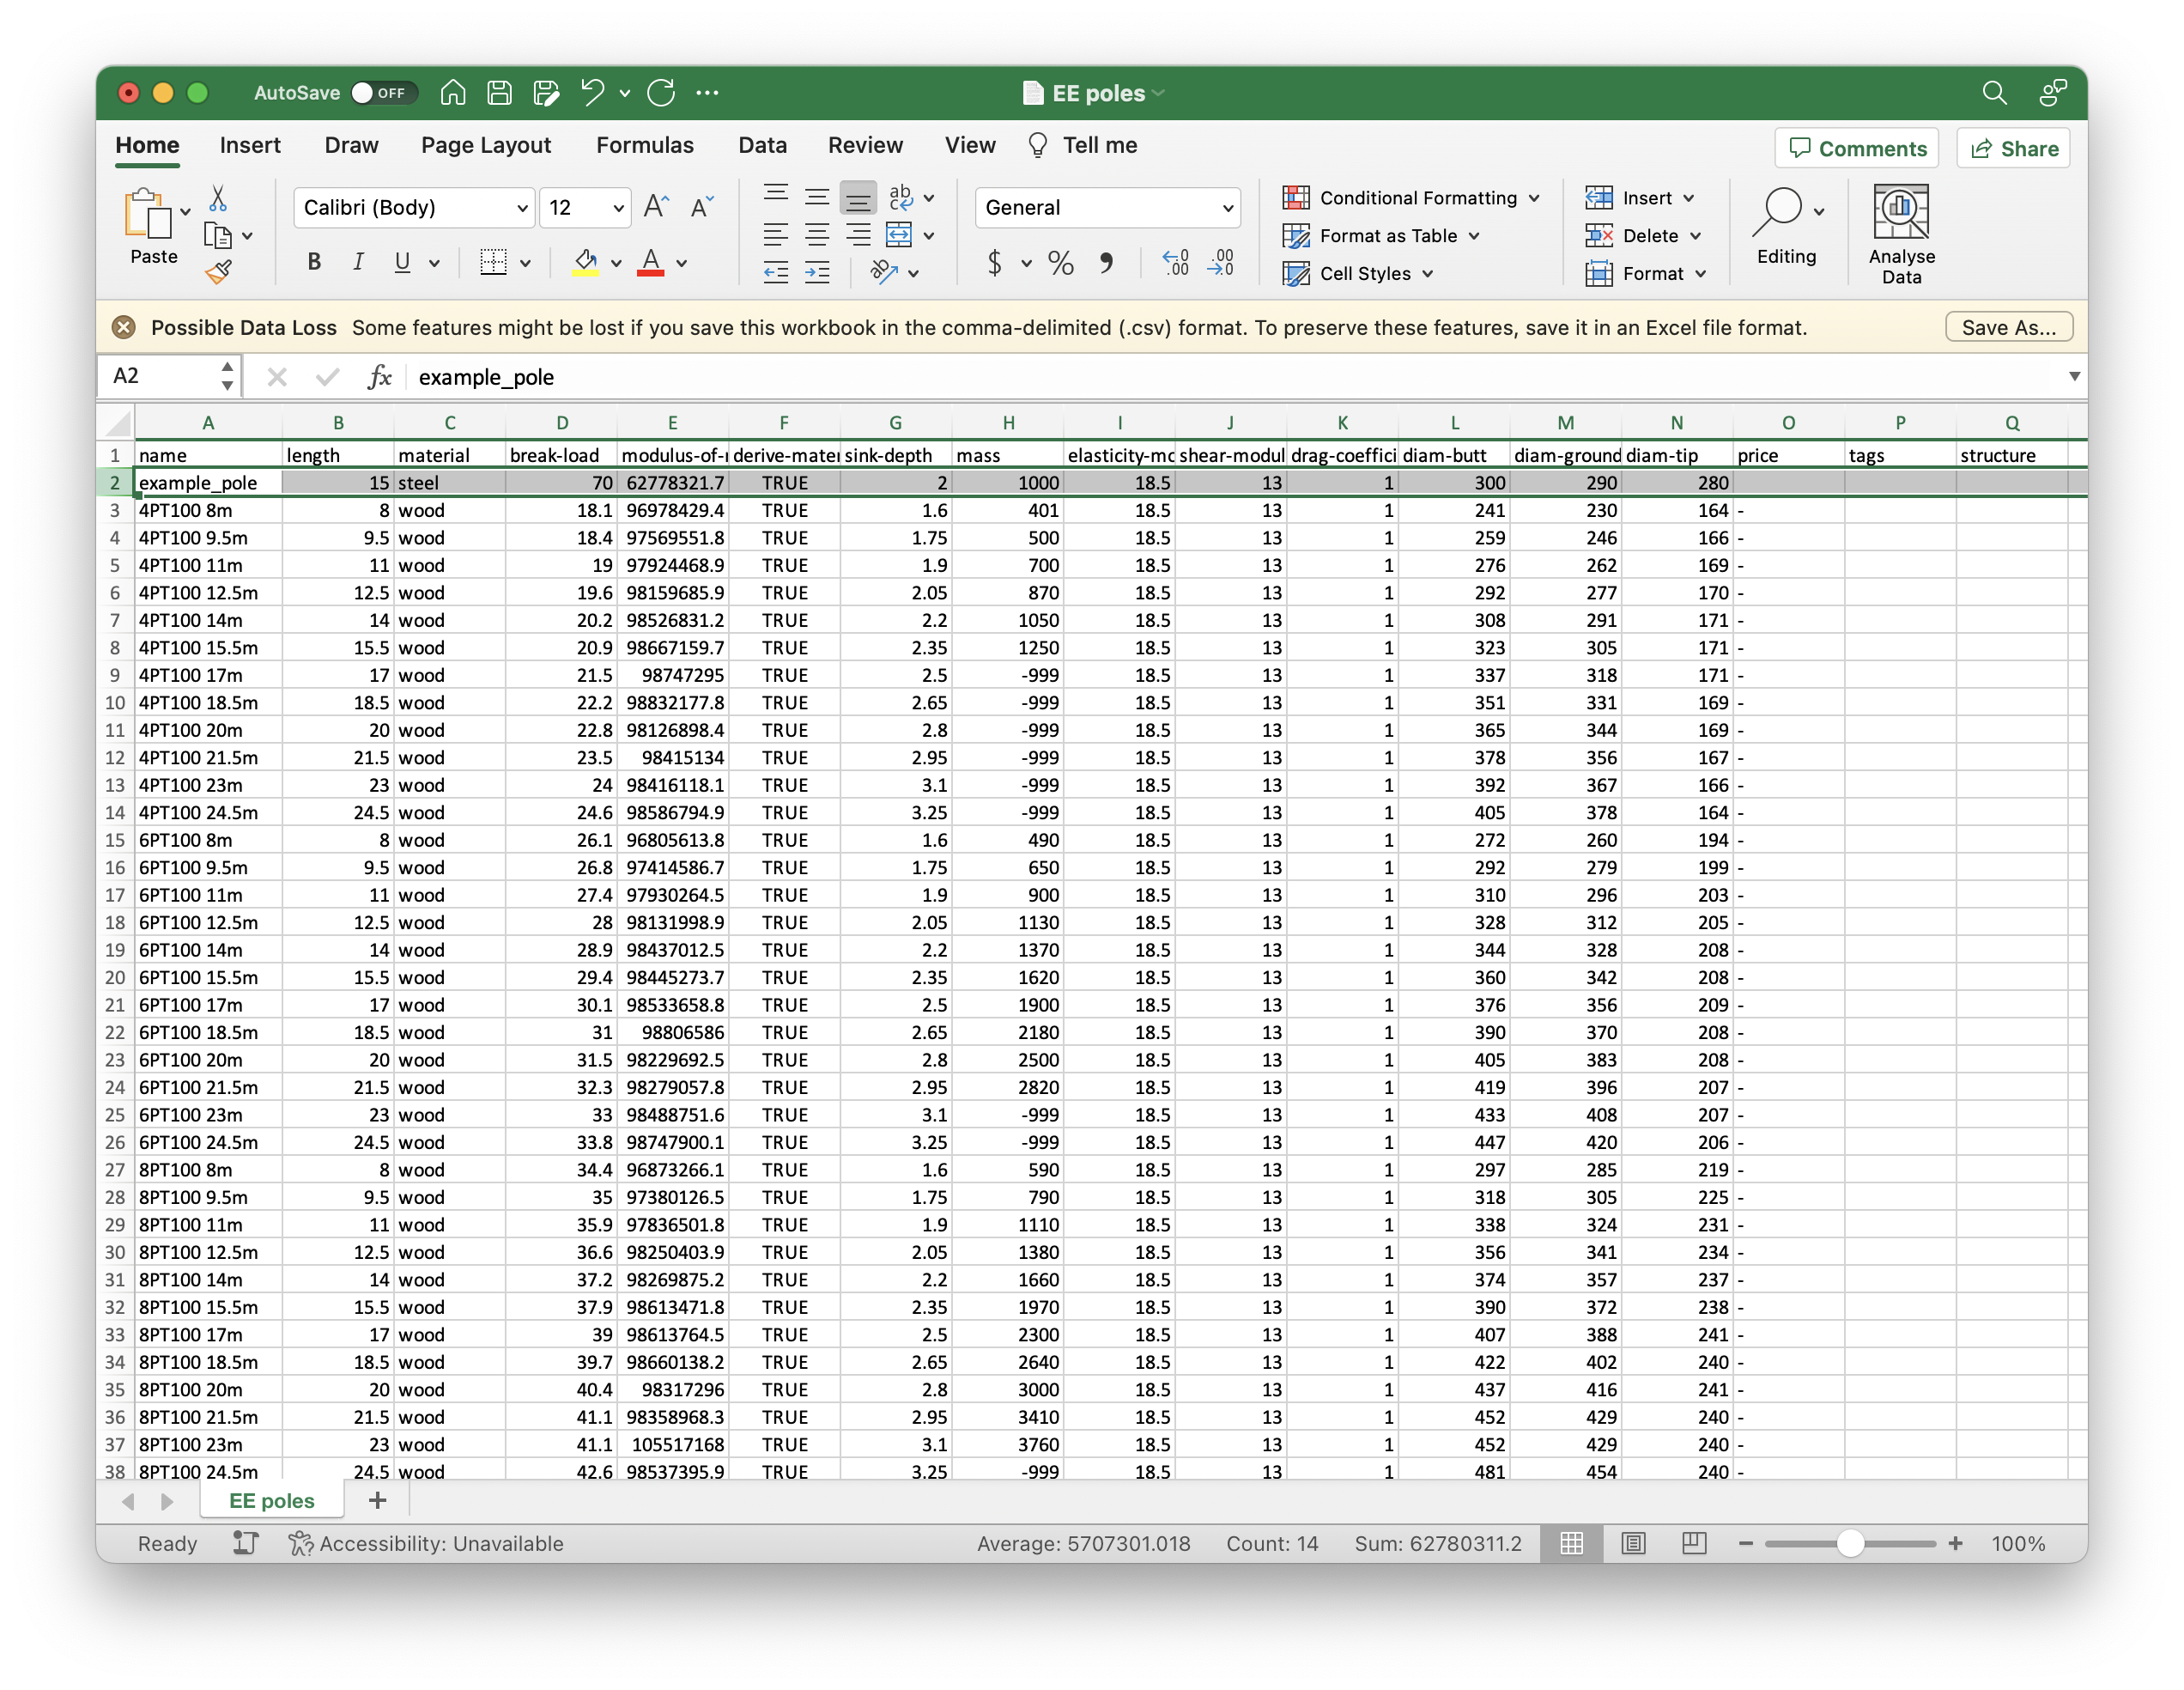
Save the file (making sure it saves in the CSV file format), and then return to Neara.
Again, from the Library menu choose Poles and on the pop-up click Replace and then OK. You will be prompted to select the updated CSV file on your device:
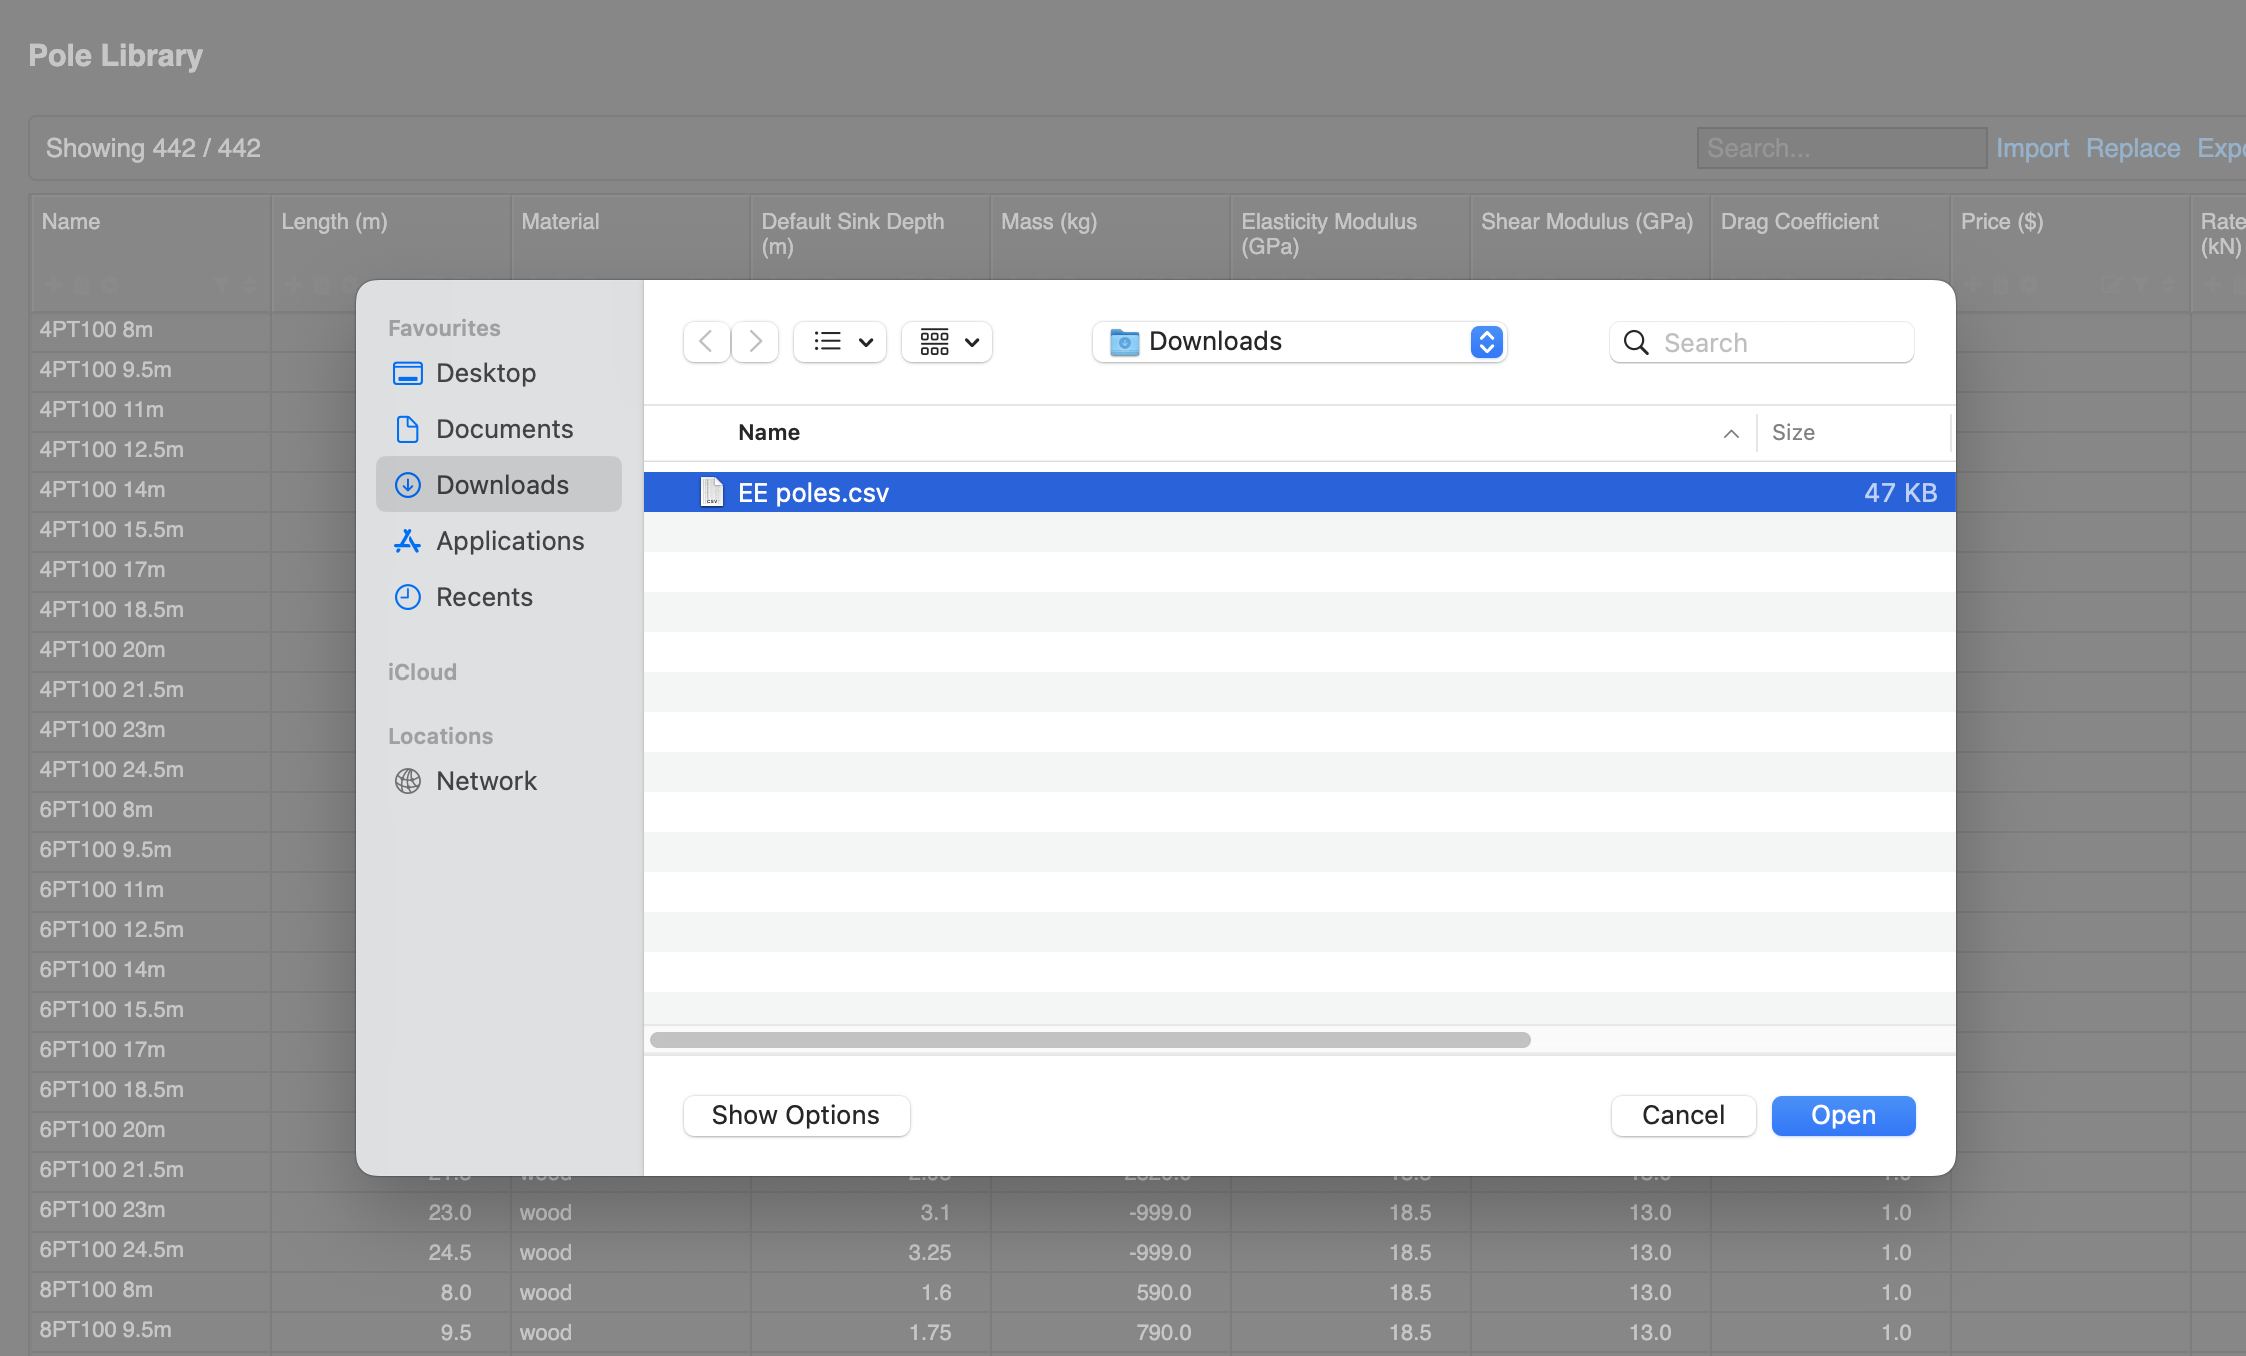
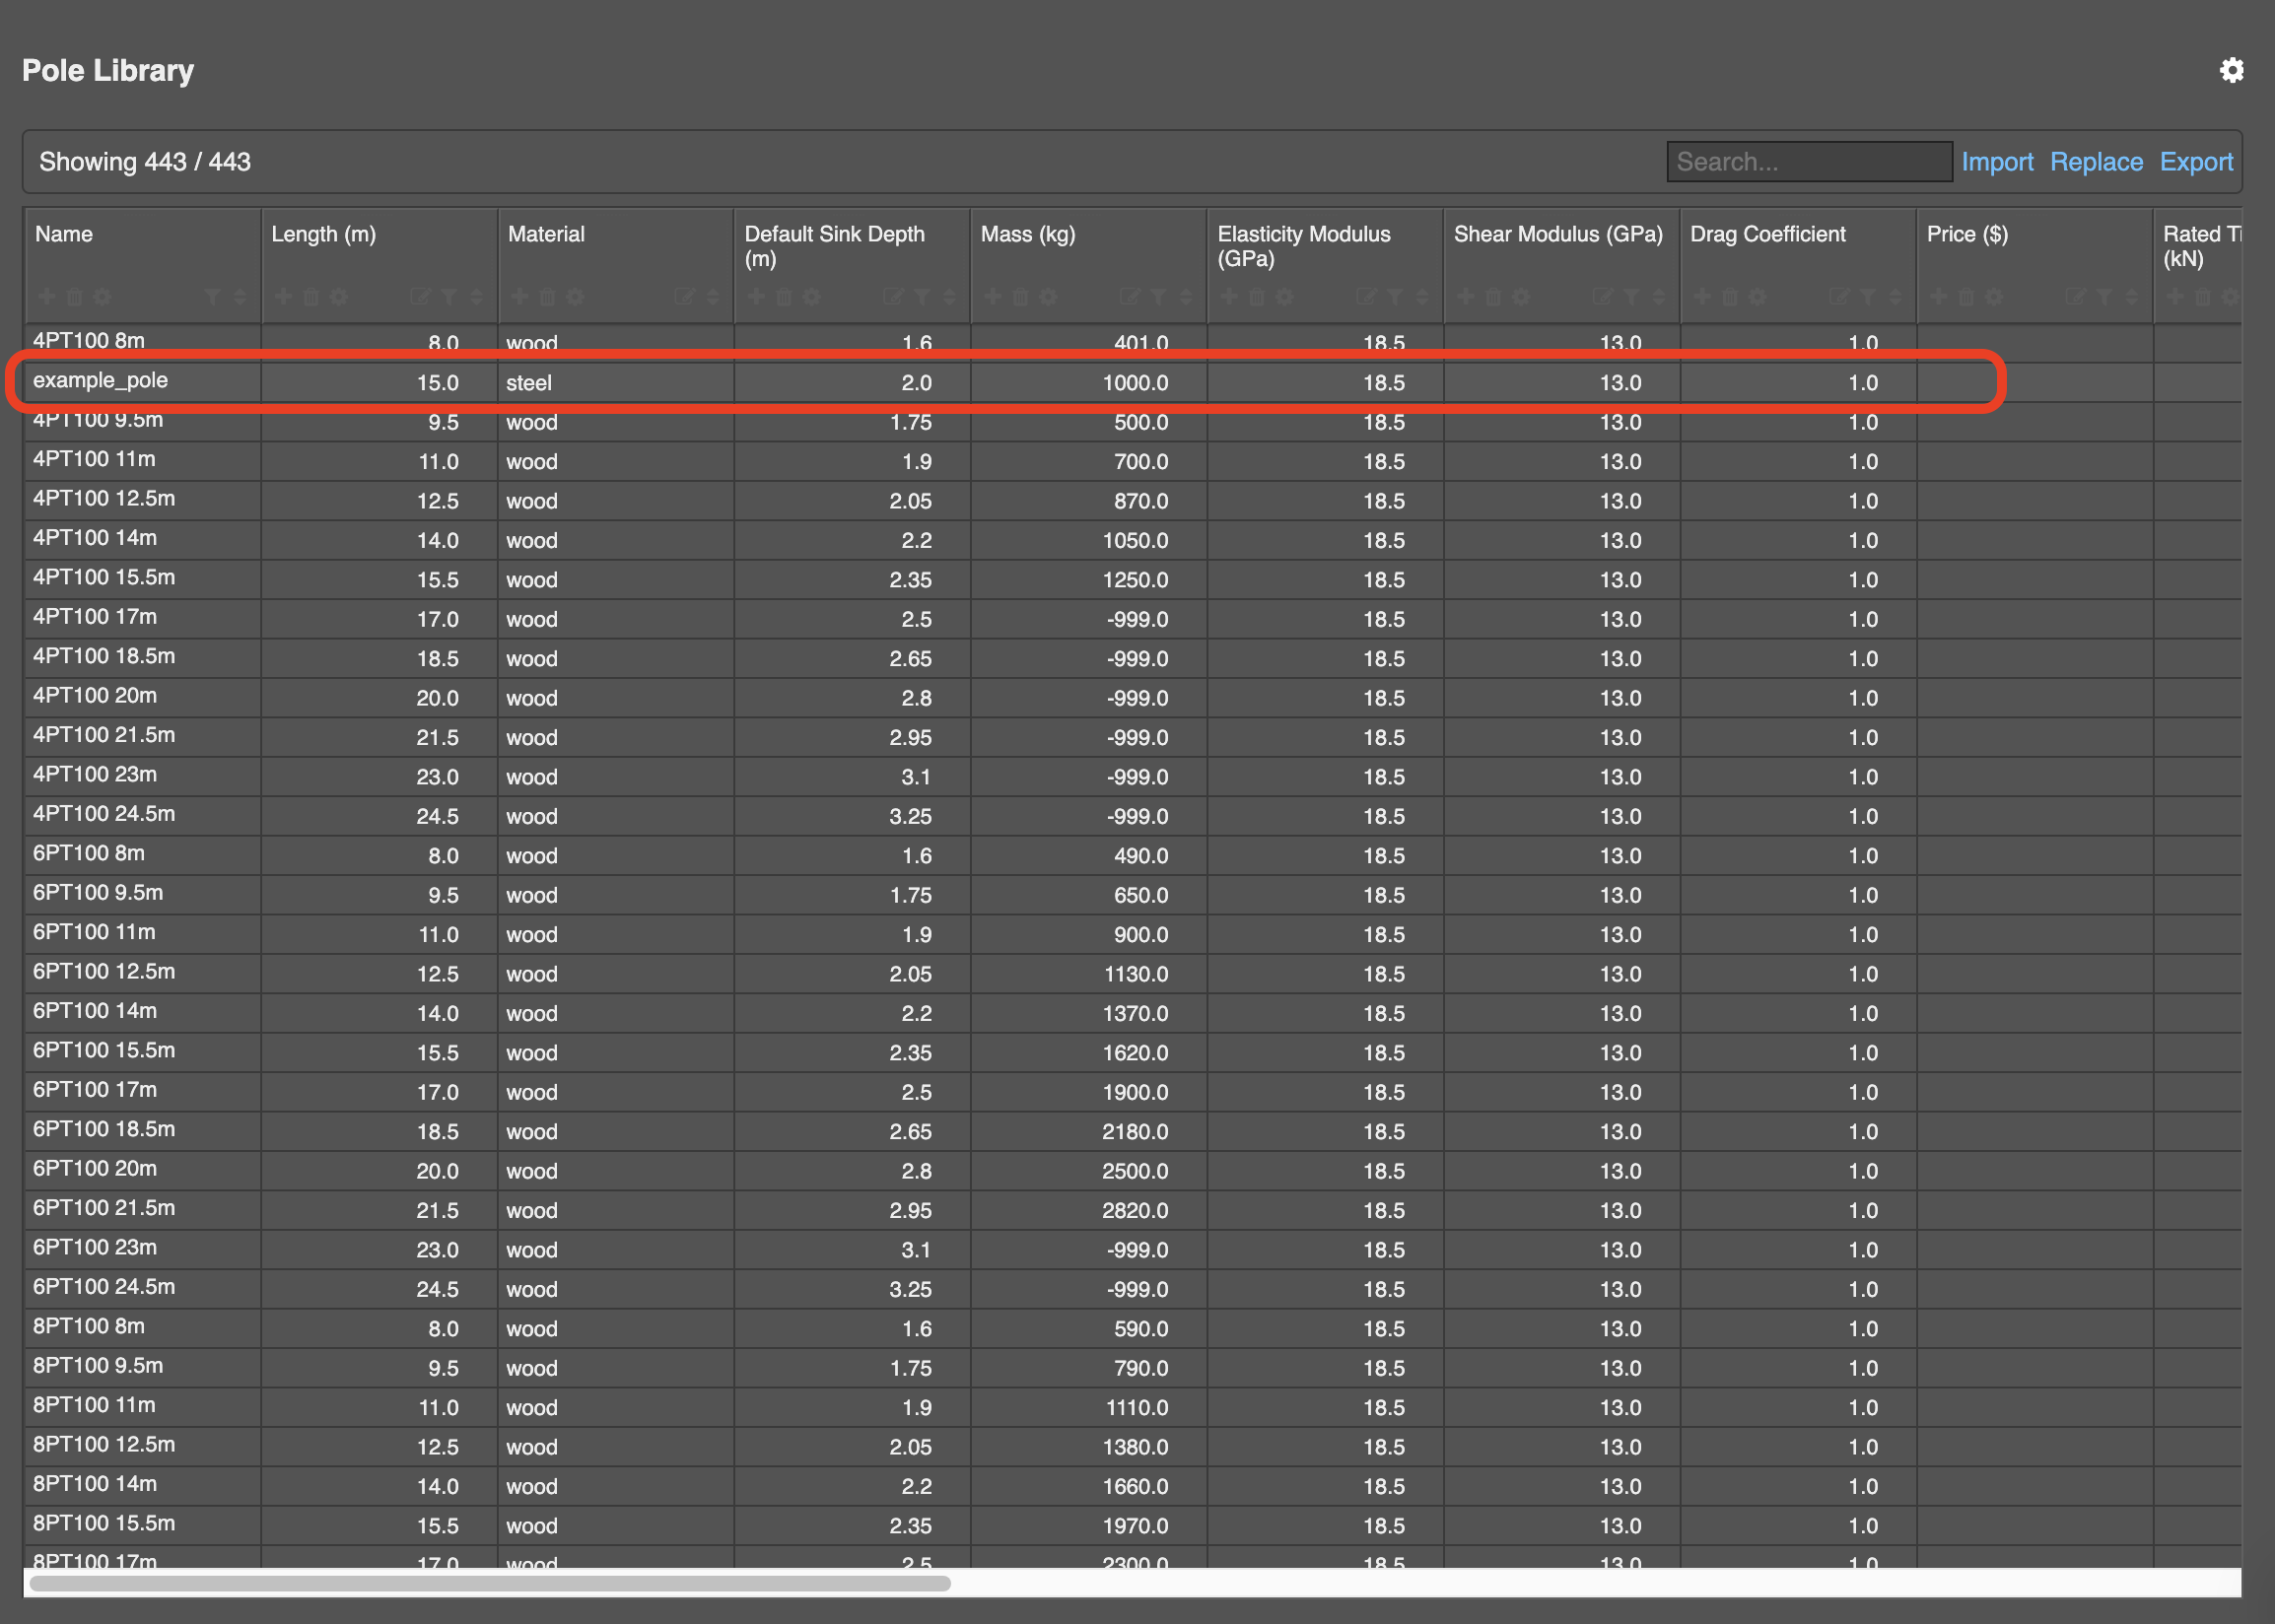
Select the file, and once the import and replace is complete you should see the new poles in the Library:
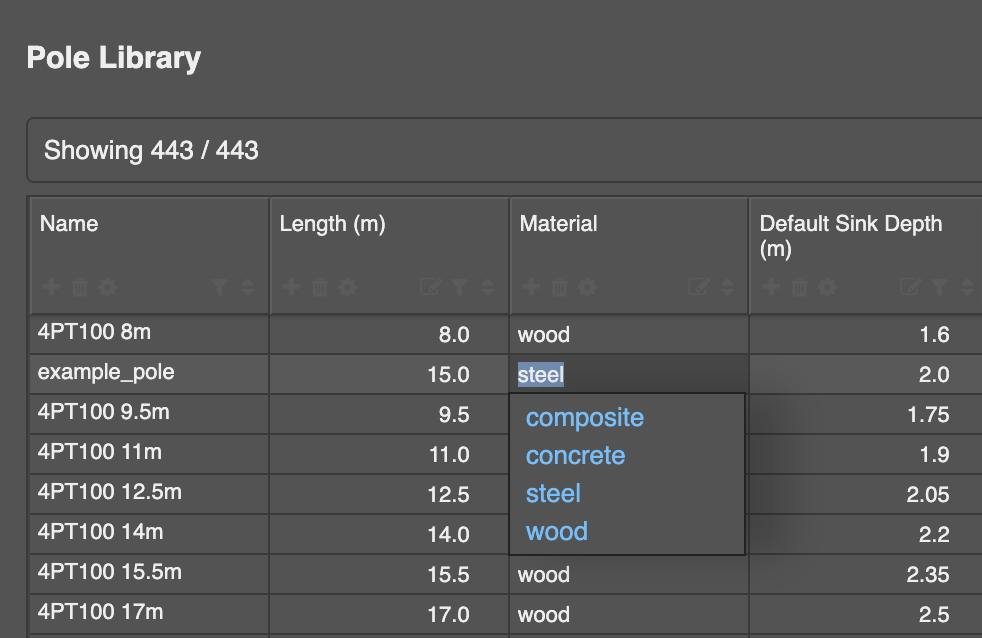
Modifying pole material & structure
Pole material and structure type can changed by clicking on the field in the pole's row in the Pole Library.
Available pole materials include:
- Wood
- Steel
- Concrete
- Composite
Available pole structure types include:
- Circular
- Sectioned
- Rectangular
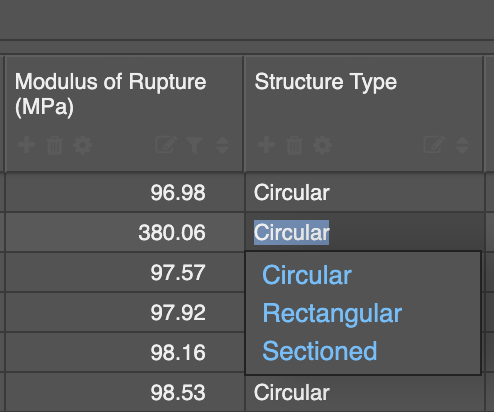
If Sectioned is chosen, you will see the “Sections” column in the pole library populate 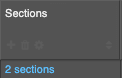 and this can be clicked on to specify individual characteristics of each section and add/removed sections to create your pole.
Supported section shapes are:
- Circle
- Rectangular
- Ring
You can then click save to save the changes or cancel to discard.
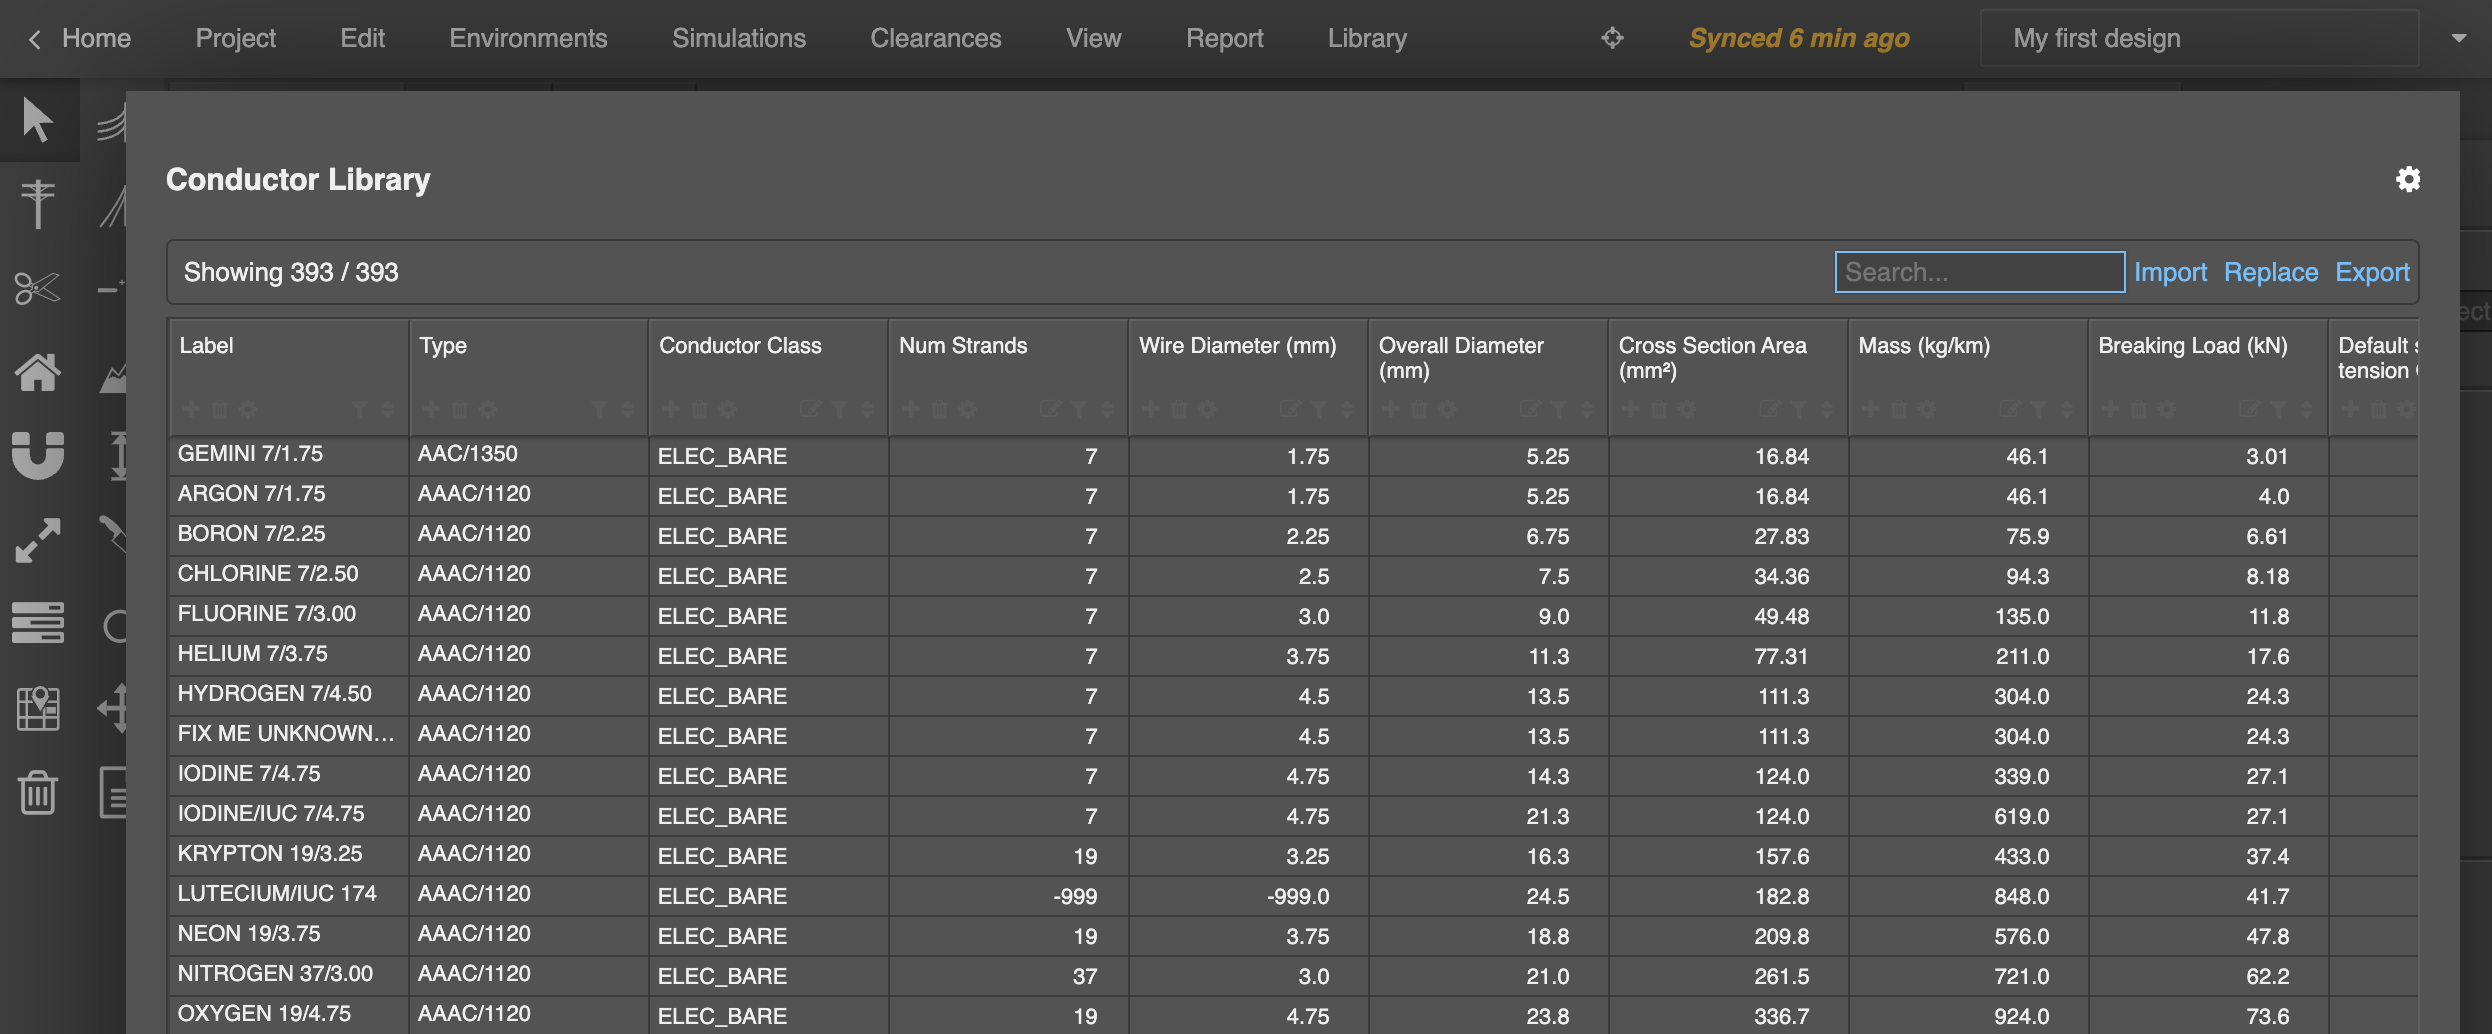
Creating conductors
To create conductors follow the same steps as with creating poles, selecting Library menu > Conductors instead:
Creating components
To create assemblies, the first step is to create the components that form the pole top construction.
To make a component, find a component that reflects the type of component that we are trying to model. For example, if we are trying to make a post insulator we need to find an existing generic post insulator.
Select Library menu > Components and on the pop-up enter keywords to search for in the Search box, for example Post Insulator.
Select an existing item from the search results on the left, click Make a copy in the lower-right of the pop-up, name it, and edit the design specifications for the new component in the right-hand side of the pop-up. When ready, click Save in the lower-right of the pop-up.
To dismiss the pop-up, click outside of it.
Creating constructions
Once you have modelled all of your components, the next step is to fit them together.
Select Library menu > Constructions to view your Construction Library.
To make a pole top construction, first find a construction that uses the same number of cables that you are trying to model with the new construction.
In this example we will model a 3 wire vertical construction:
- In the Construction Library search for 3 wire vertical to see a list of similar constructions
- Click on one of the constructions in the left-hand side of the pop-up, and check the configuration and preview in the right-hand side
- Select Make a Copy and give the copy a name, and click OK
- If you search for your newly-named copy, it should now appear in the list to be selected for the next step
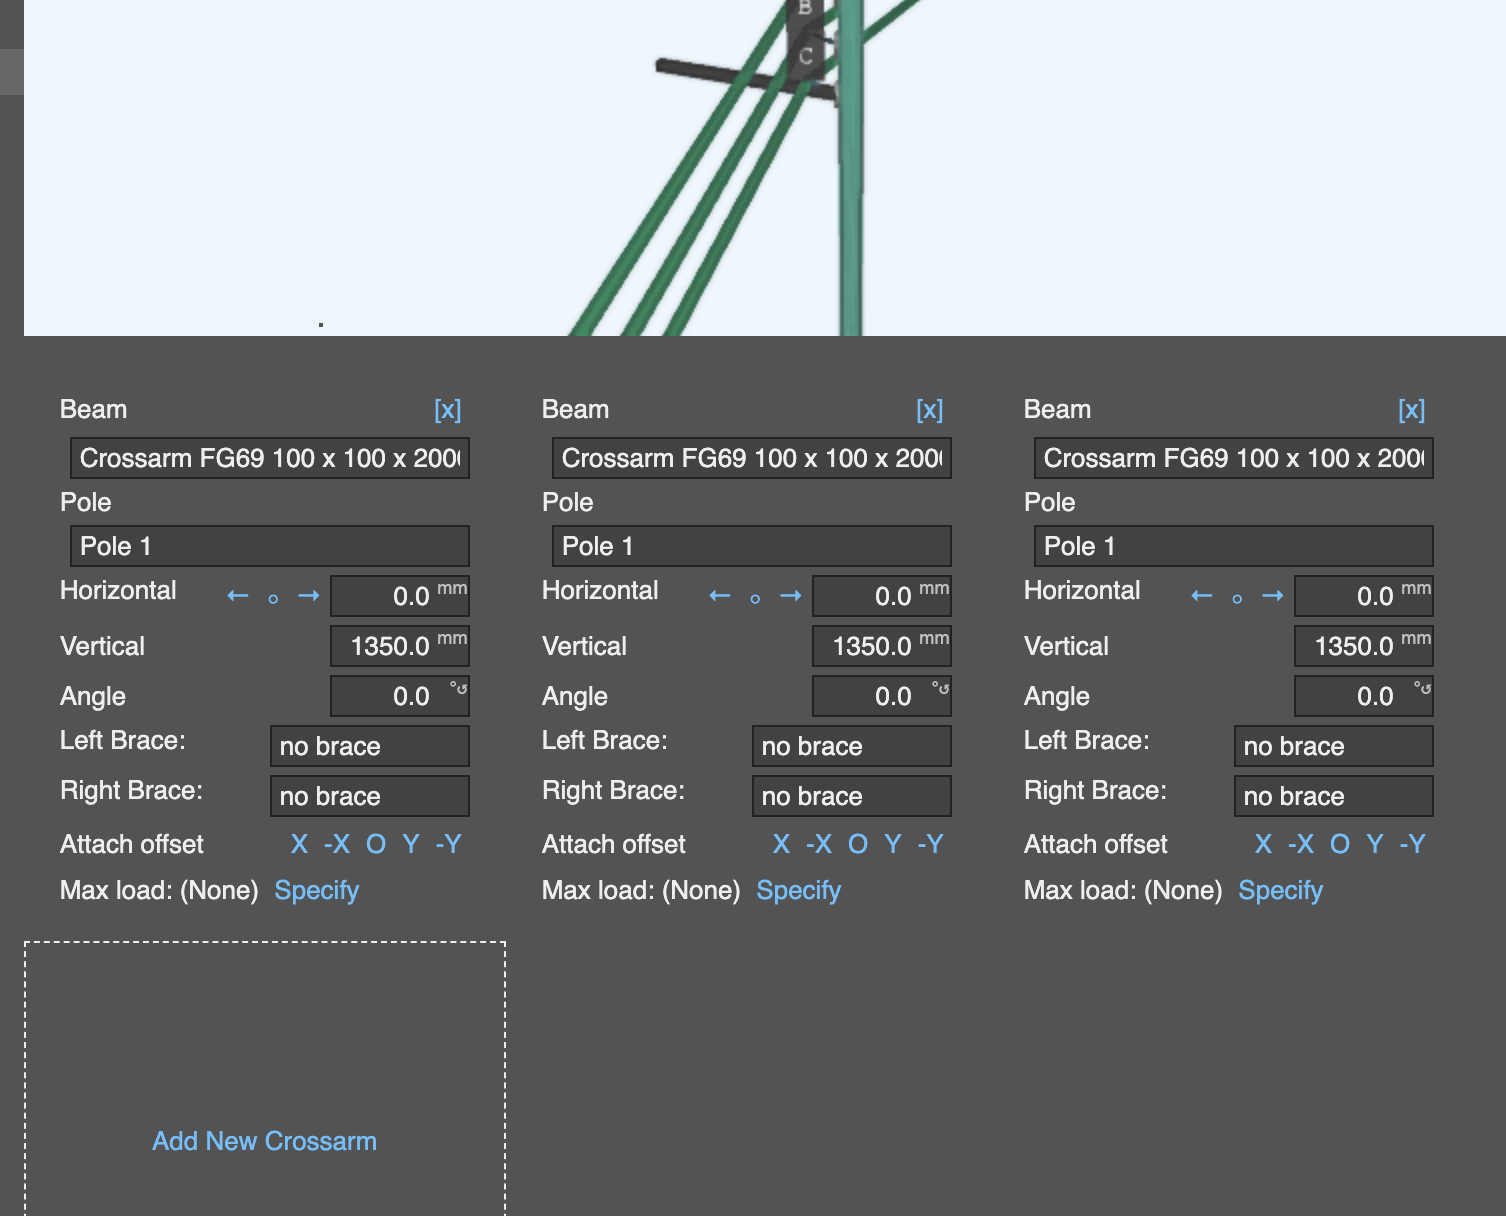
Add crossarms
In the new, copied construction, scroll down and click the Add New Crossarm option:
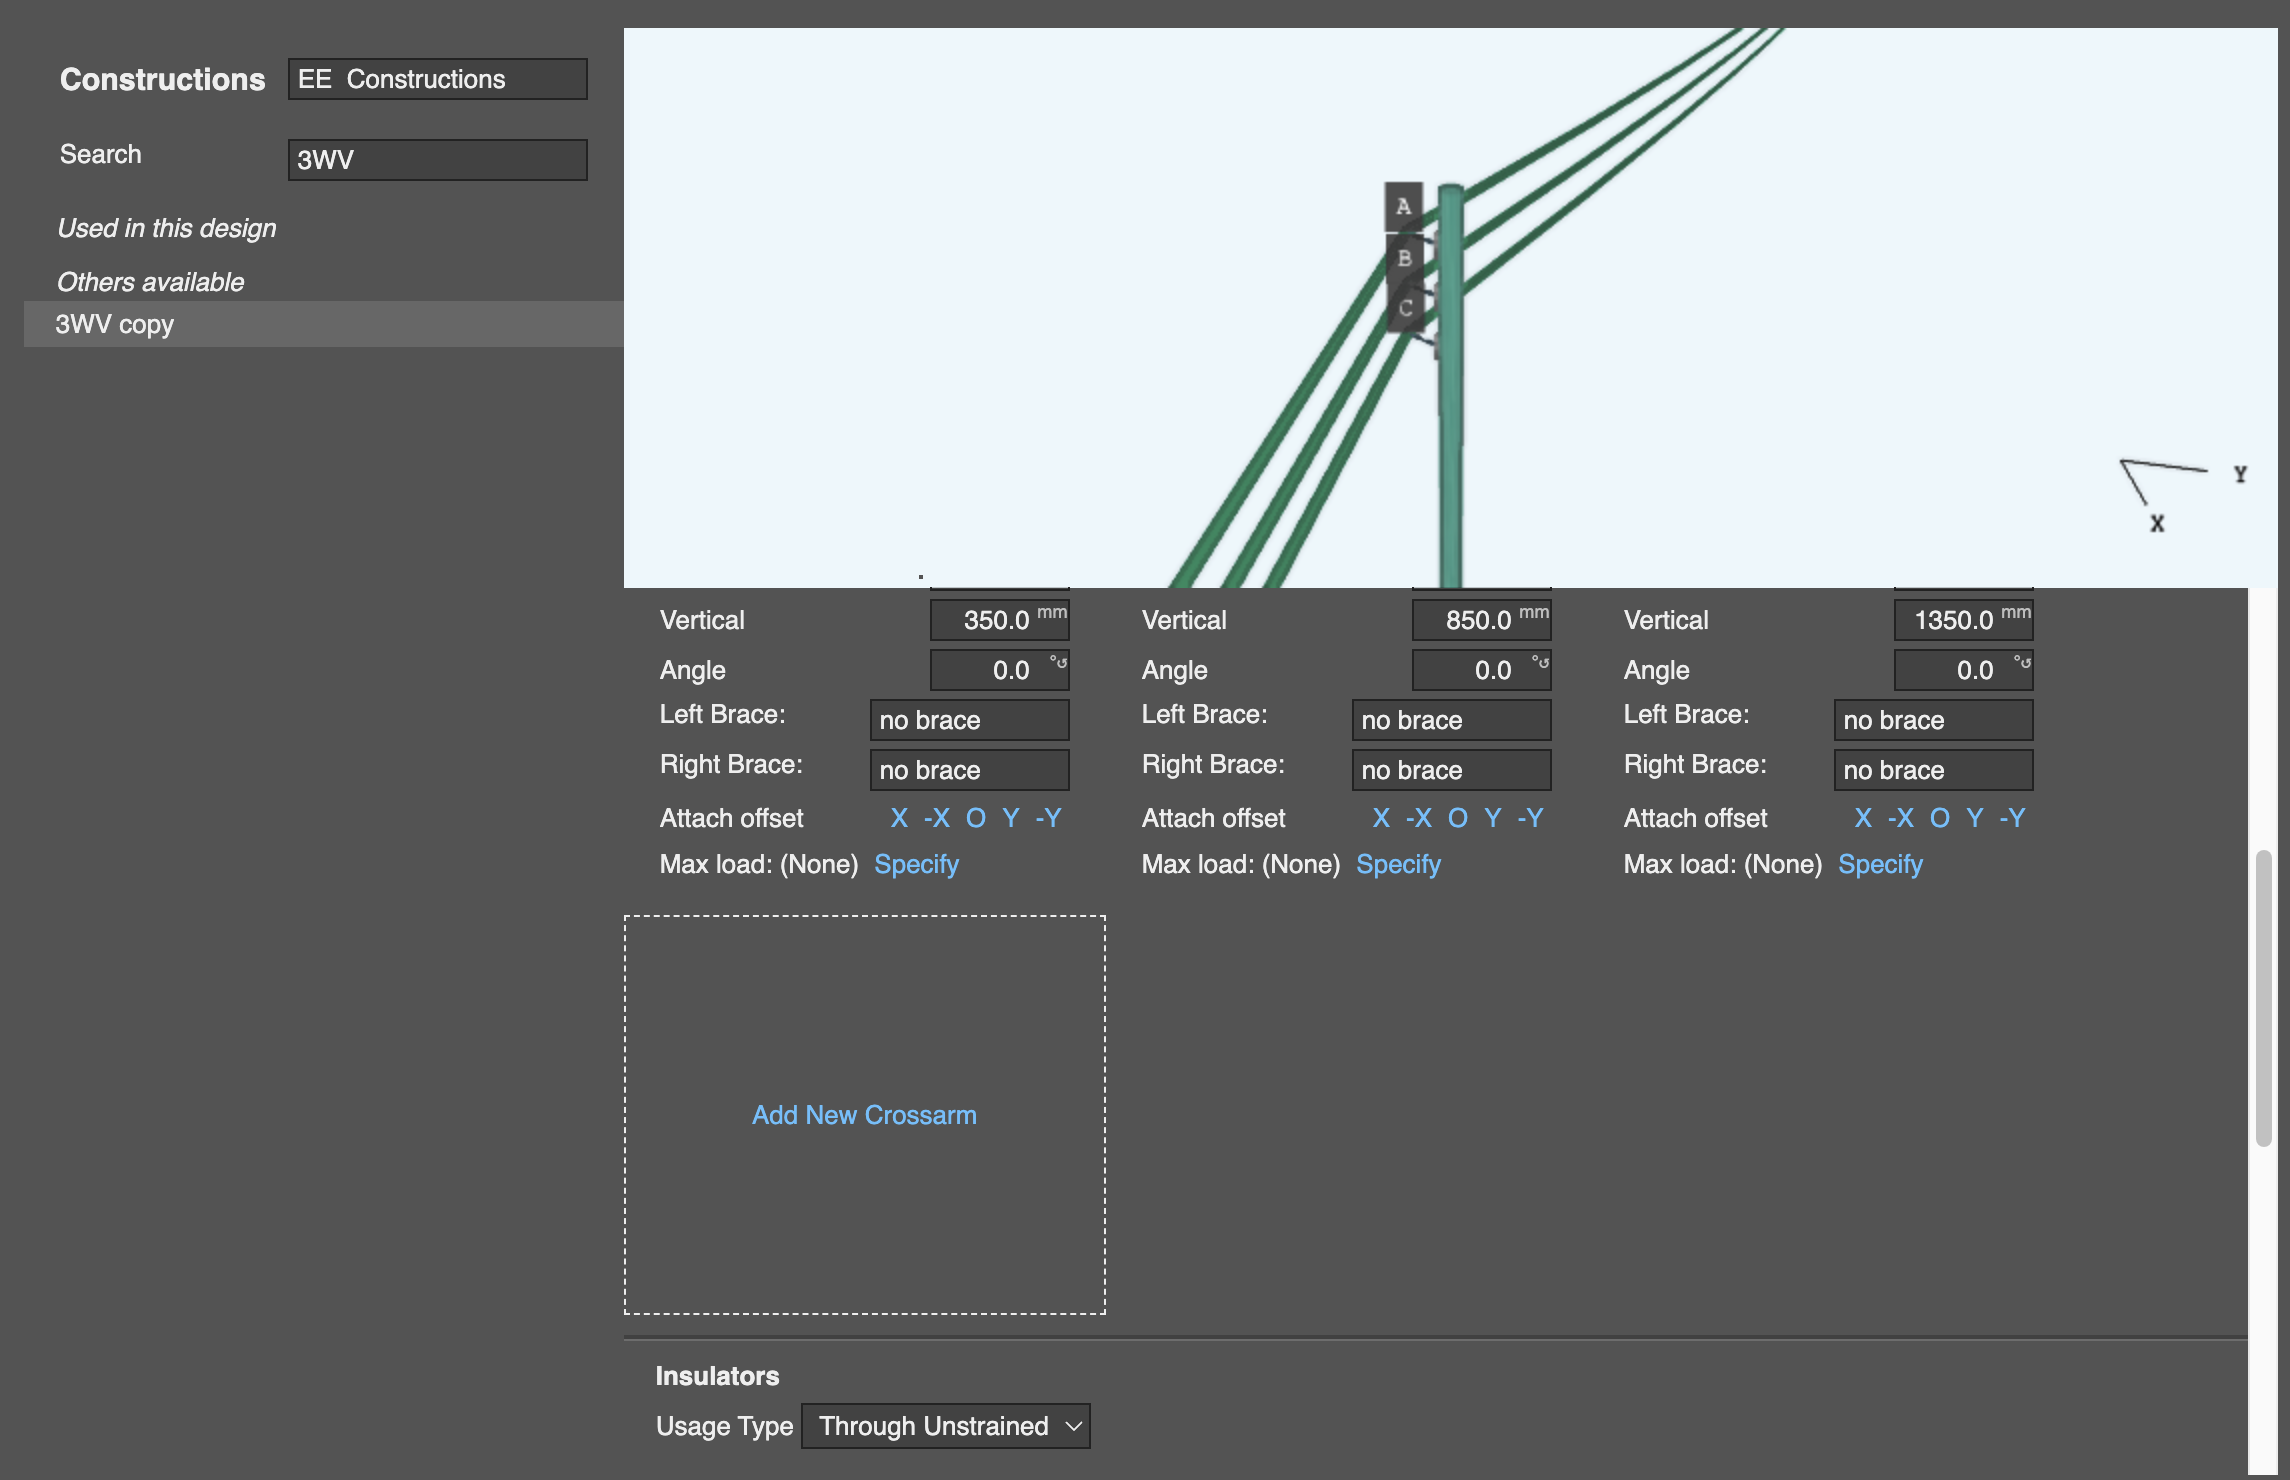
For each new crossarm added:
- Select the type of Beam to use
- Enter in the Horizontal and Vertical offsets
- Select the type of Brace(s) to attach if required
- Define the Attach offset
Fitting insulators
Scroll down further to the Insulators section of the pop-up, and for each:
- Select the Usage type to define your insulators as Termination or Through Unstrained
- Select the type of insulators to be used
- Attach it to the respective crossarm or pole
- Define its Offset and Angle of rotation
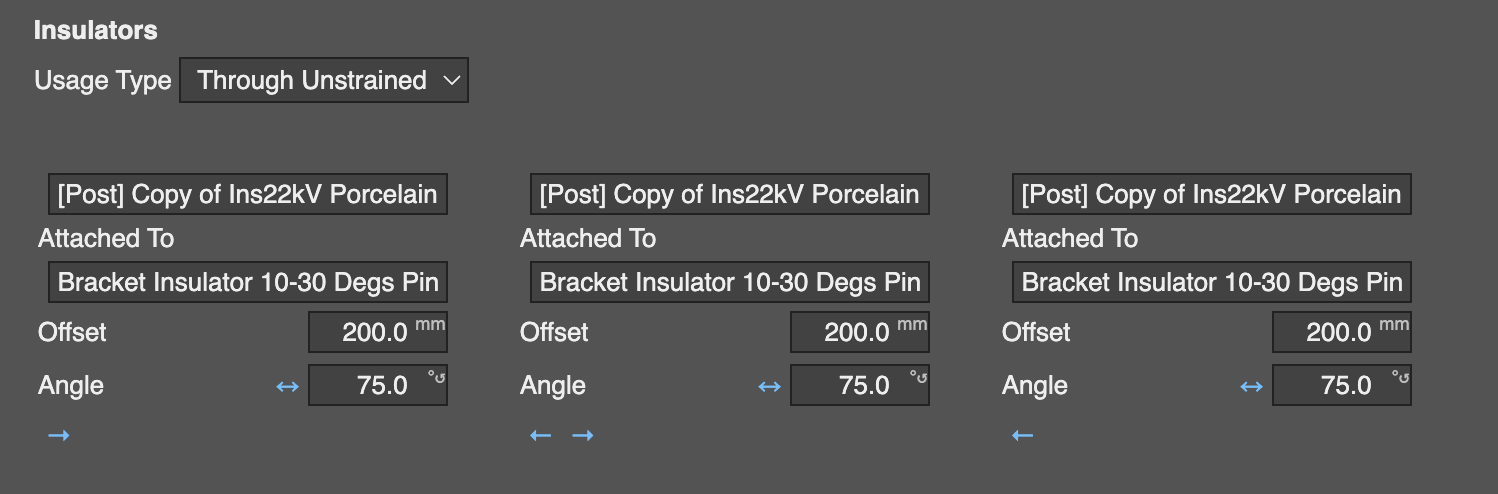
Finally, click Save in the lower-right corner of the pop-up to save the construction. Click anywhere outside the pop-up to dismiss it.