2 - Georeferenced map overlay and terrain building

Written by Cody Yakimoff
Updated at February 26th, 2024
Table of Contents
In this step you will import a georeferenced maps overlay, assign a meaningful coordinate system to it, and import data.
Click the Map tool on the Toolbar:

The Map view will appear. In the search box, type and select an address, and then click on a point in the map to import that area:
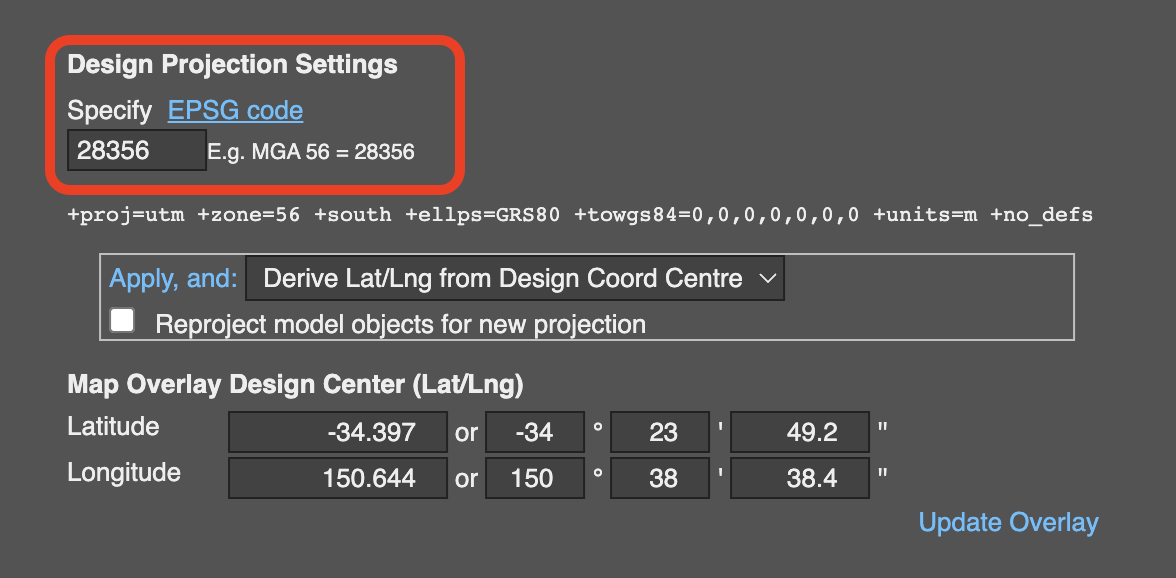
In the Design Center panel to the right of the map click Edit to show the Map Project Settings:

On the pop-up, confirm or type in the EPSG code for your design area:
On the same pop-up, change the selection to Derive Design Coord Centre from Lat/Lng:
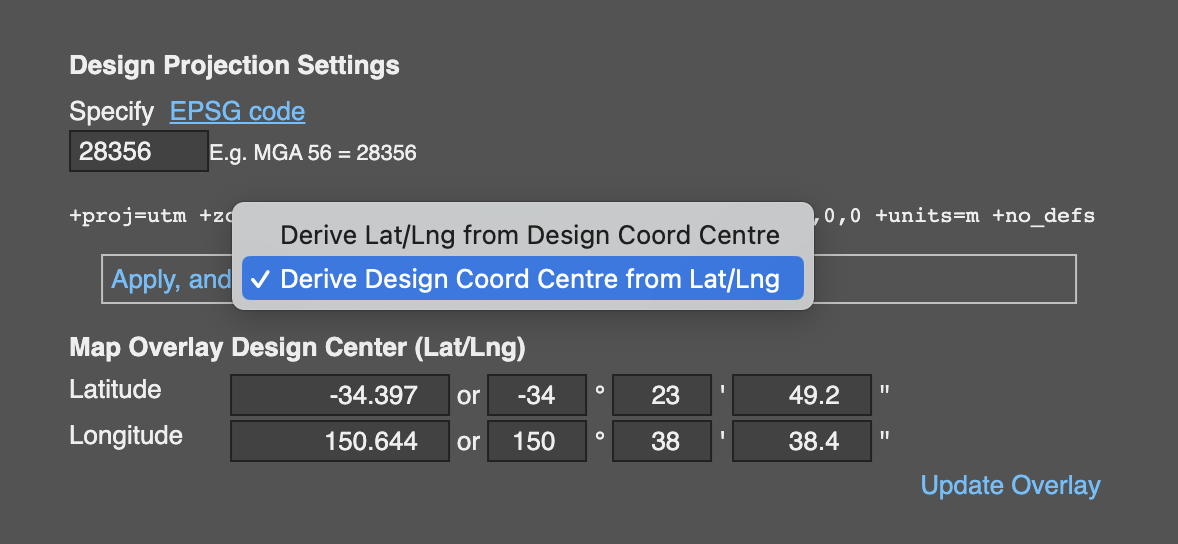
and click the Apply, and option.
Switch back to the Perspective view and you'll see the map overlay in place:

When you anchor your design to a particular location and move your mouse over the different views, the Latitude and Longitude of the cursor location will be displayed in the bottom right corner:

Modelling terrain
Data that you can import into Neara includes:
- DXF (Terrain, Pole data, Overlaying image etc...)
- CSV (Survey files)
- LiDAR (.las files)
- KML
Preparing a survey file
We will import a survey file, and using the Survey tool to model the terrain profile. Your survey file must be in Comma-Separated Values (.CSV) file format.
A survey file can include a combination of ground and structure feature points, including:
- Ground
- Water
- Road
- Vegetation
- Building
- Railway
- Special
- Structure (every time we specify structure a pole is placed)
- Conductor
The CSV file must be in the following format using the following headers:
x |
y |
z |
type |
name |
comment |
331664.03 |
6259321.44 |
33.2 |
ground |
ground |
a comment |
331655.31 |
6259362.29 |
32.4 |
structure |
pole2 |
a comment |
331715.32 |
6259209.44 |
29 |
structure |
pole5 |
a comment |
Download the sample survey file
This sample survey file with a combination of ground and feature points should be used as you follow the next steps in this tutorial:
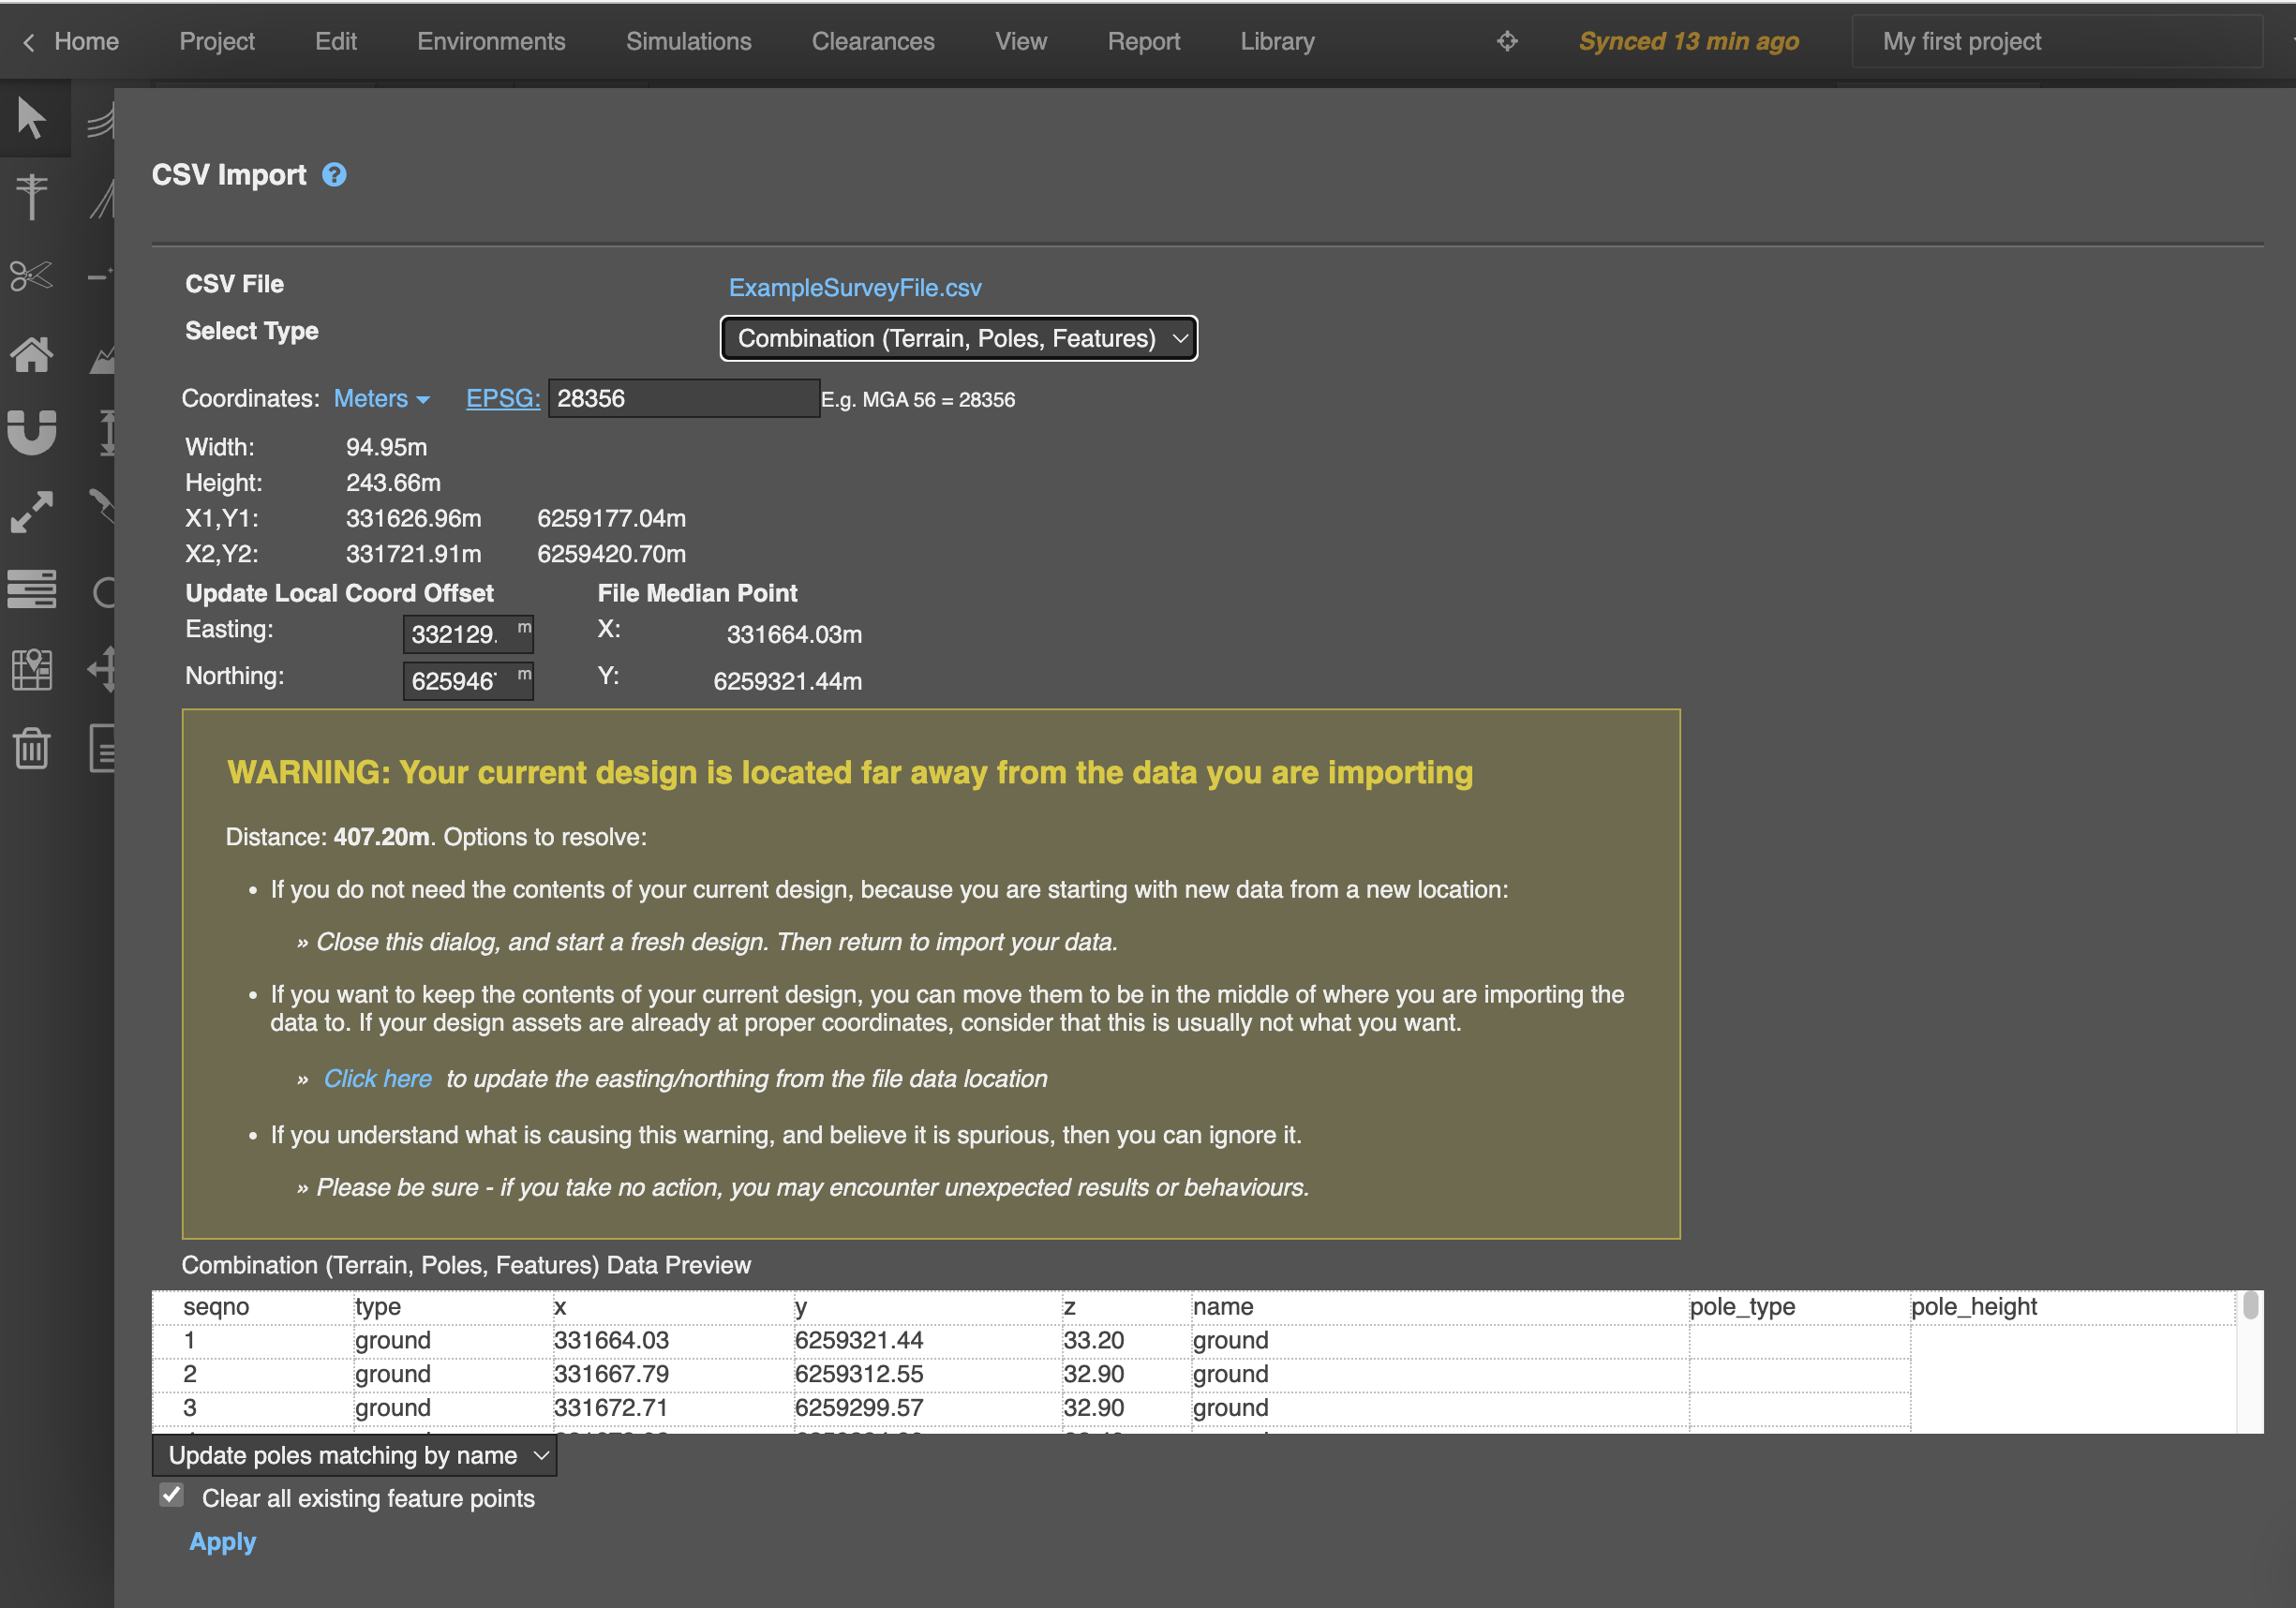
Import the survey file
- Select Project menu > Import from CSV
- On the pop-up, select the CSV file and choose Combination in the Select Type dropdown
- Click Apply at the bottom of the popup
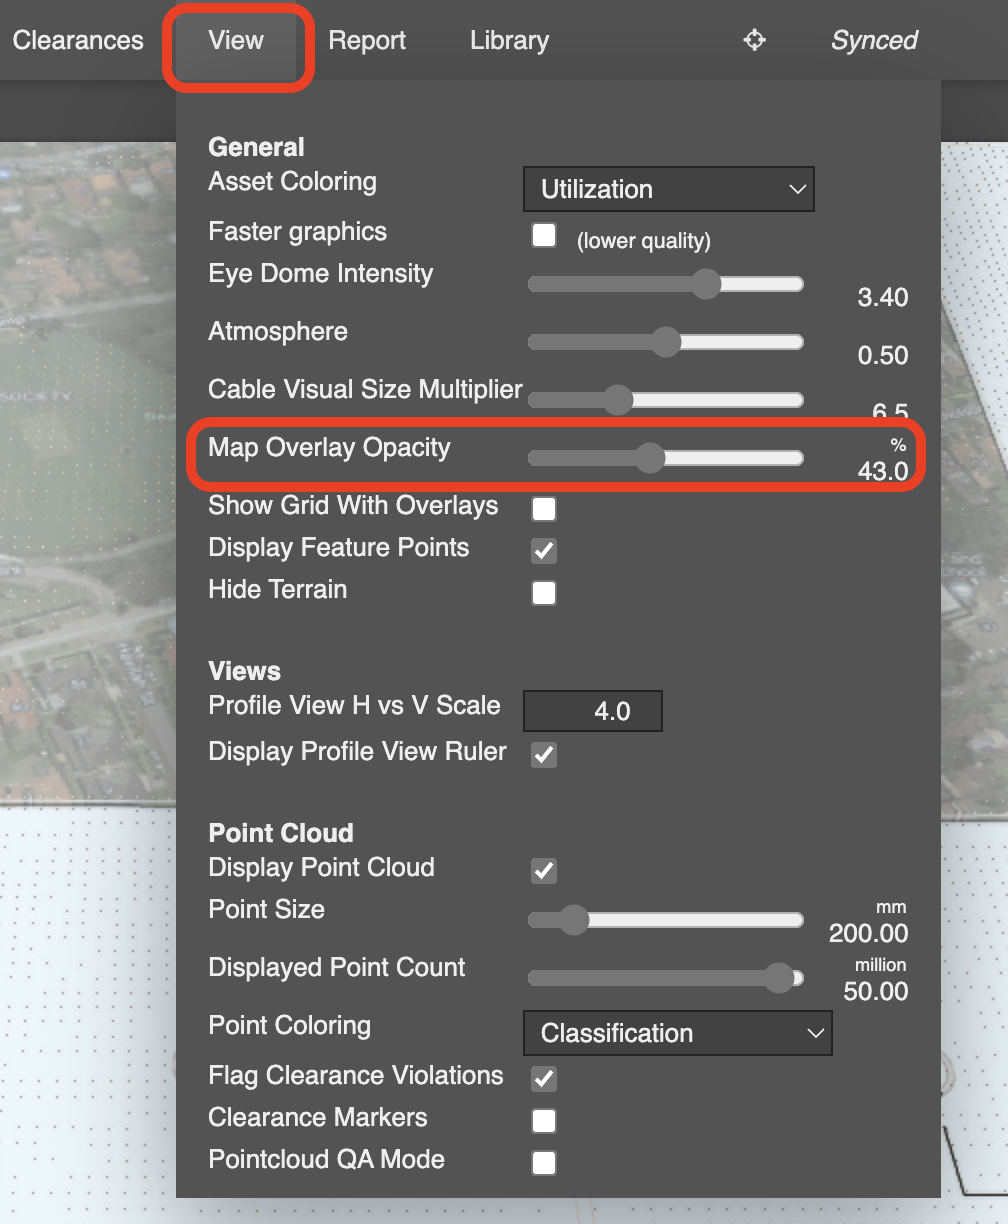
If you find it difficult to see the imported survey points against the map imagery in the perspective view, you can decrease the Map overlay opacity under the View menu:
Filling in sparse ground survey data
Sometimes you may have areas with sparse ground survey data. The Survey tool provide two ways to help you fill in data.
Interpolating ground profile between two points
- Select the Survey tool from the toolbar
- Select one survey point
- Select the Interpolate terrain points option in the right-hand sidebar
- Select a second survey point
- Neara will interpolate between the two survey points
Place points manually
- Select the Survey tool on the toolbar
- Left-click to place survey points
- Under Feature point in the sidebar, set the properties for the newly placed point
Importing terrain from a DXF file
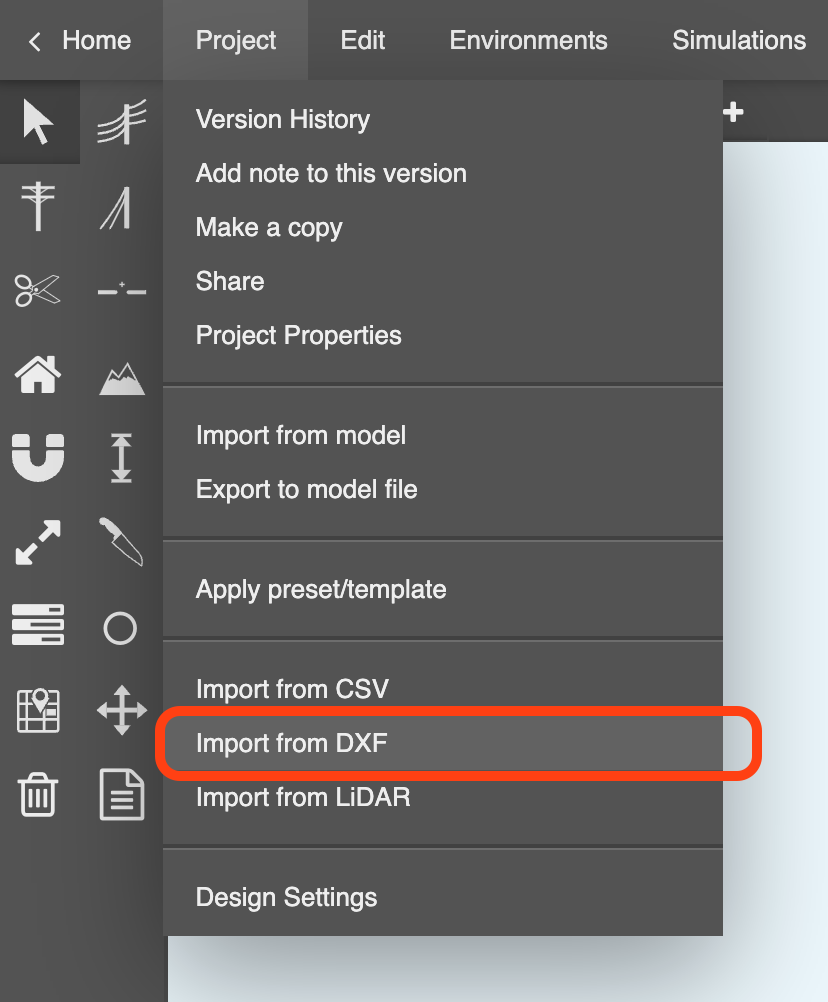
From the Project menu select Import from DXF:
When prompted, select the DXF file on your device that contains the terrain. Once uploaded and processed, a preview of the file is shown:
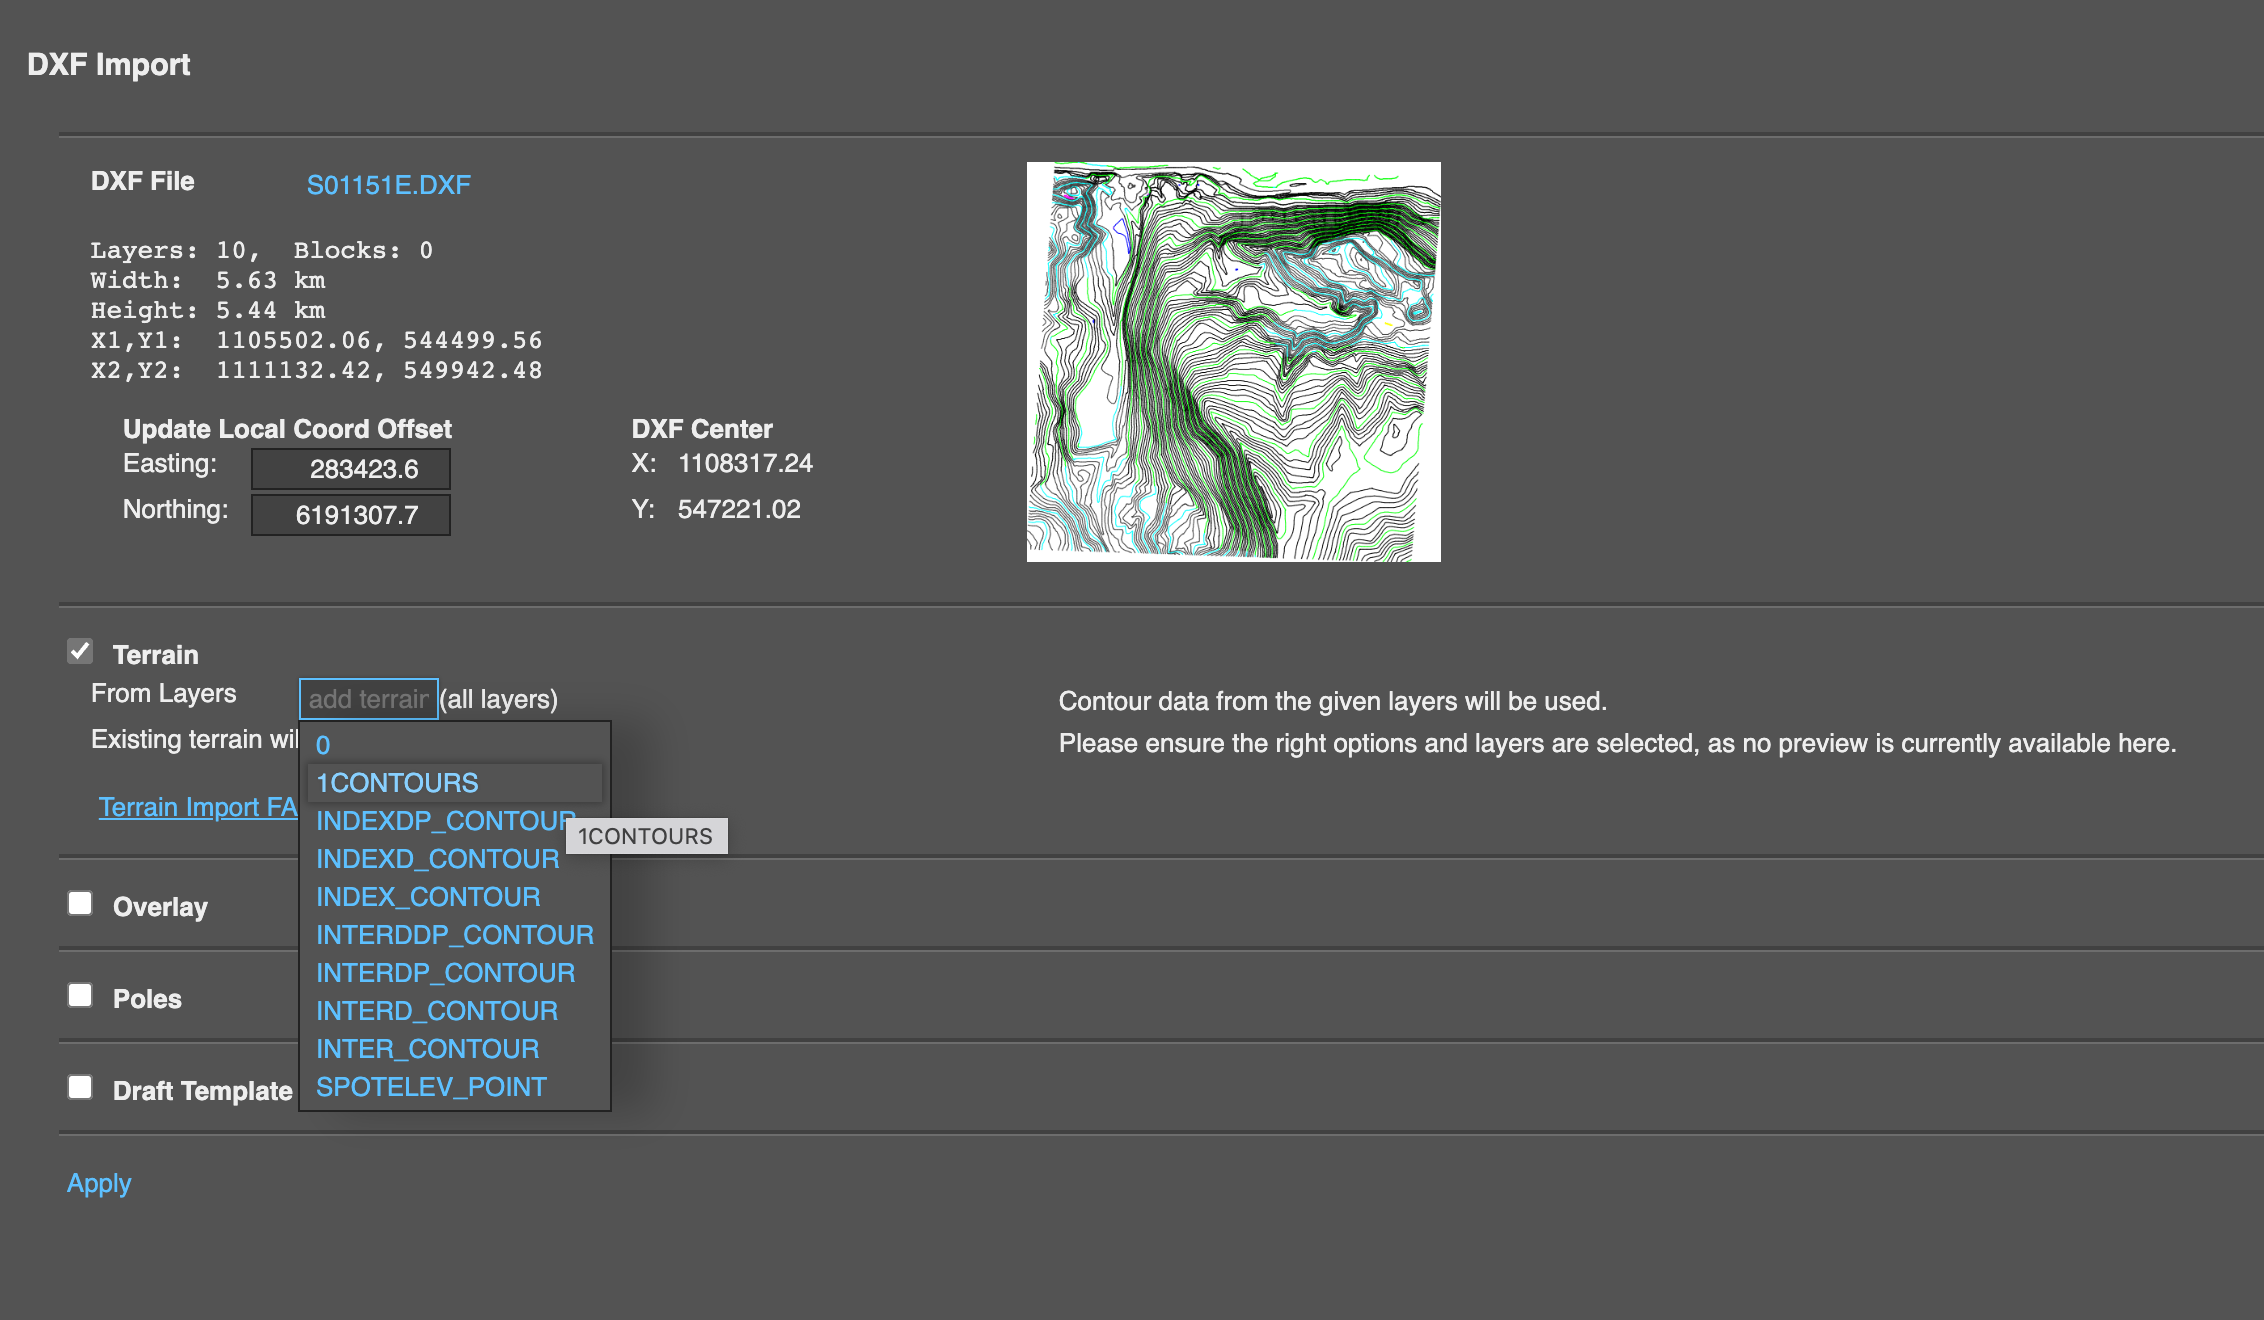
Place a checkmark in the Terrain checkbox, select the layer(s) to import from in the file, and click Apply.
About the DXF import options
- Terrain: Specify the layer that contains terrain data in this section. Neara will try to automatically find the terrain information if no layer is specified. For complex DXF files, it is best to specified the layer the terrain data is contained in.
- Overlay: The DXF can be converted to an image for the purpose of being a ground overlay. This is useful where clearances to existing proposed obstructions, land features property lines need to be met and is shown on a DXF file.
- Poles: Further specify the pole layer that the poles sit on. Once you've finished, click apply to bring in the specified data and the model will load. To apply the google maps overlay, click the survey tool and add in your appropriate EPSG.
To close the popup and cancel the import, click anywhere outside the popup.
Units of measurement
The units used in the DXF file are assumed to be metres.
Troubleshooting
See: Troubleshooting issues when importing DXF files
Download the design file used for this tutorial here: https://app.neara.com/powerapp#designId:dnz5Kpu50IRf
Next: 3 - Creating poles / conductors / constructions / components