Step 1: Import & preview LiDAR data
Discover how to easily import data into your project with this step-by-step guide.

Written by Jannet Xiao
Updated at September 12th, 2023
Table of Contents
If you do not see these features in your Neara projects and would like to explore Automatic LiDAR Classification, contact our Customer Success team using the Contact Us link above; or if logged into the Neara app choose Chat with support from the Help menu
Neara makes it easy to import LiDAR data from your computer – or directly from connected cloud storage – using the the Point Cloud Importer panel.
Using the Point Cloud Importer panel
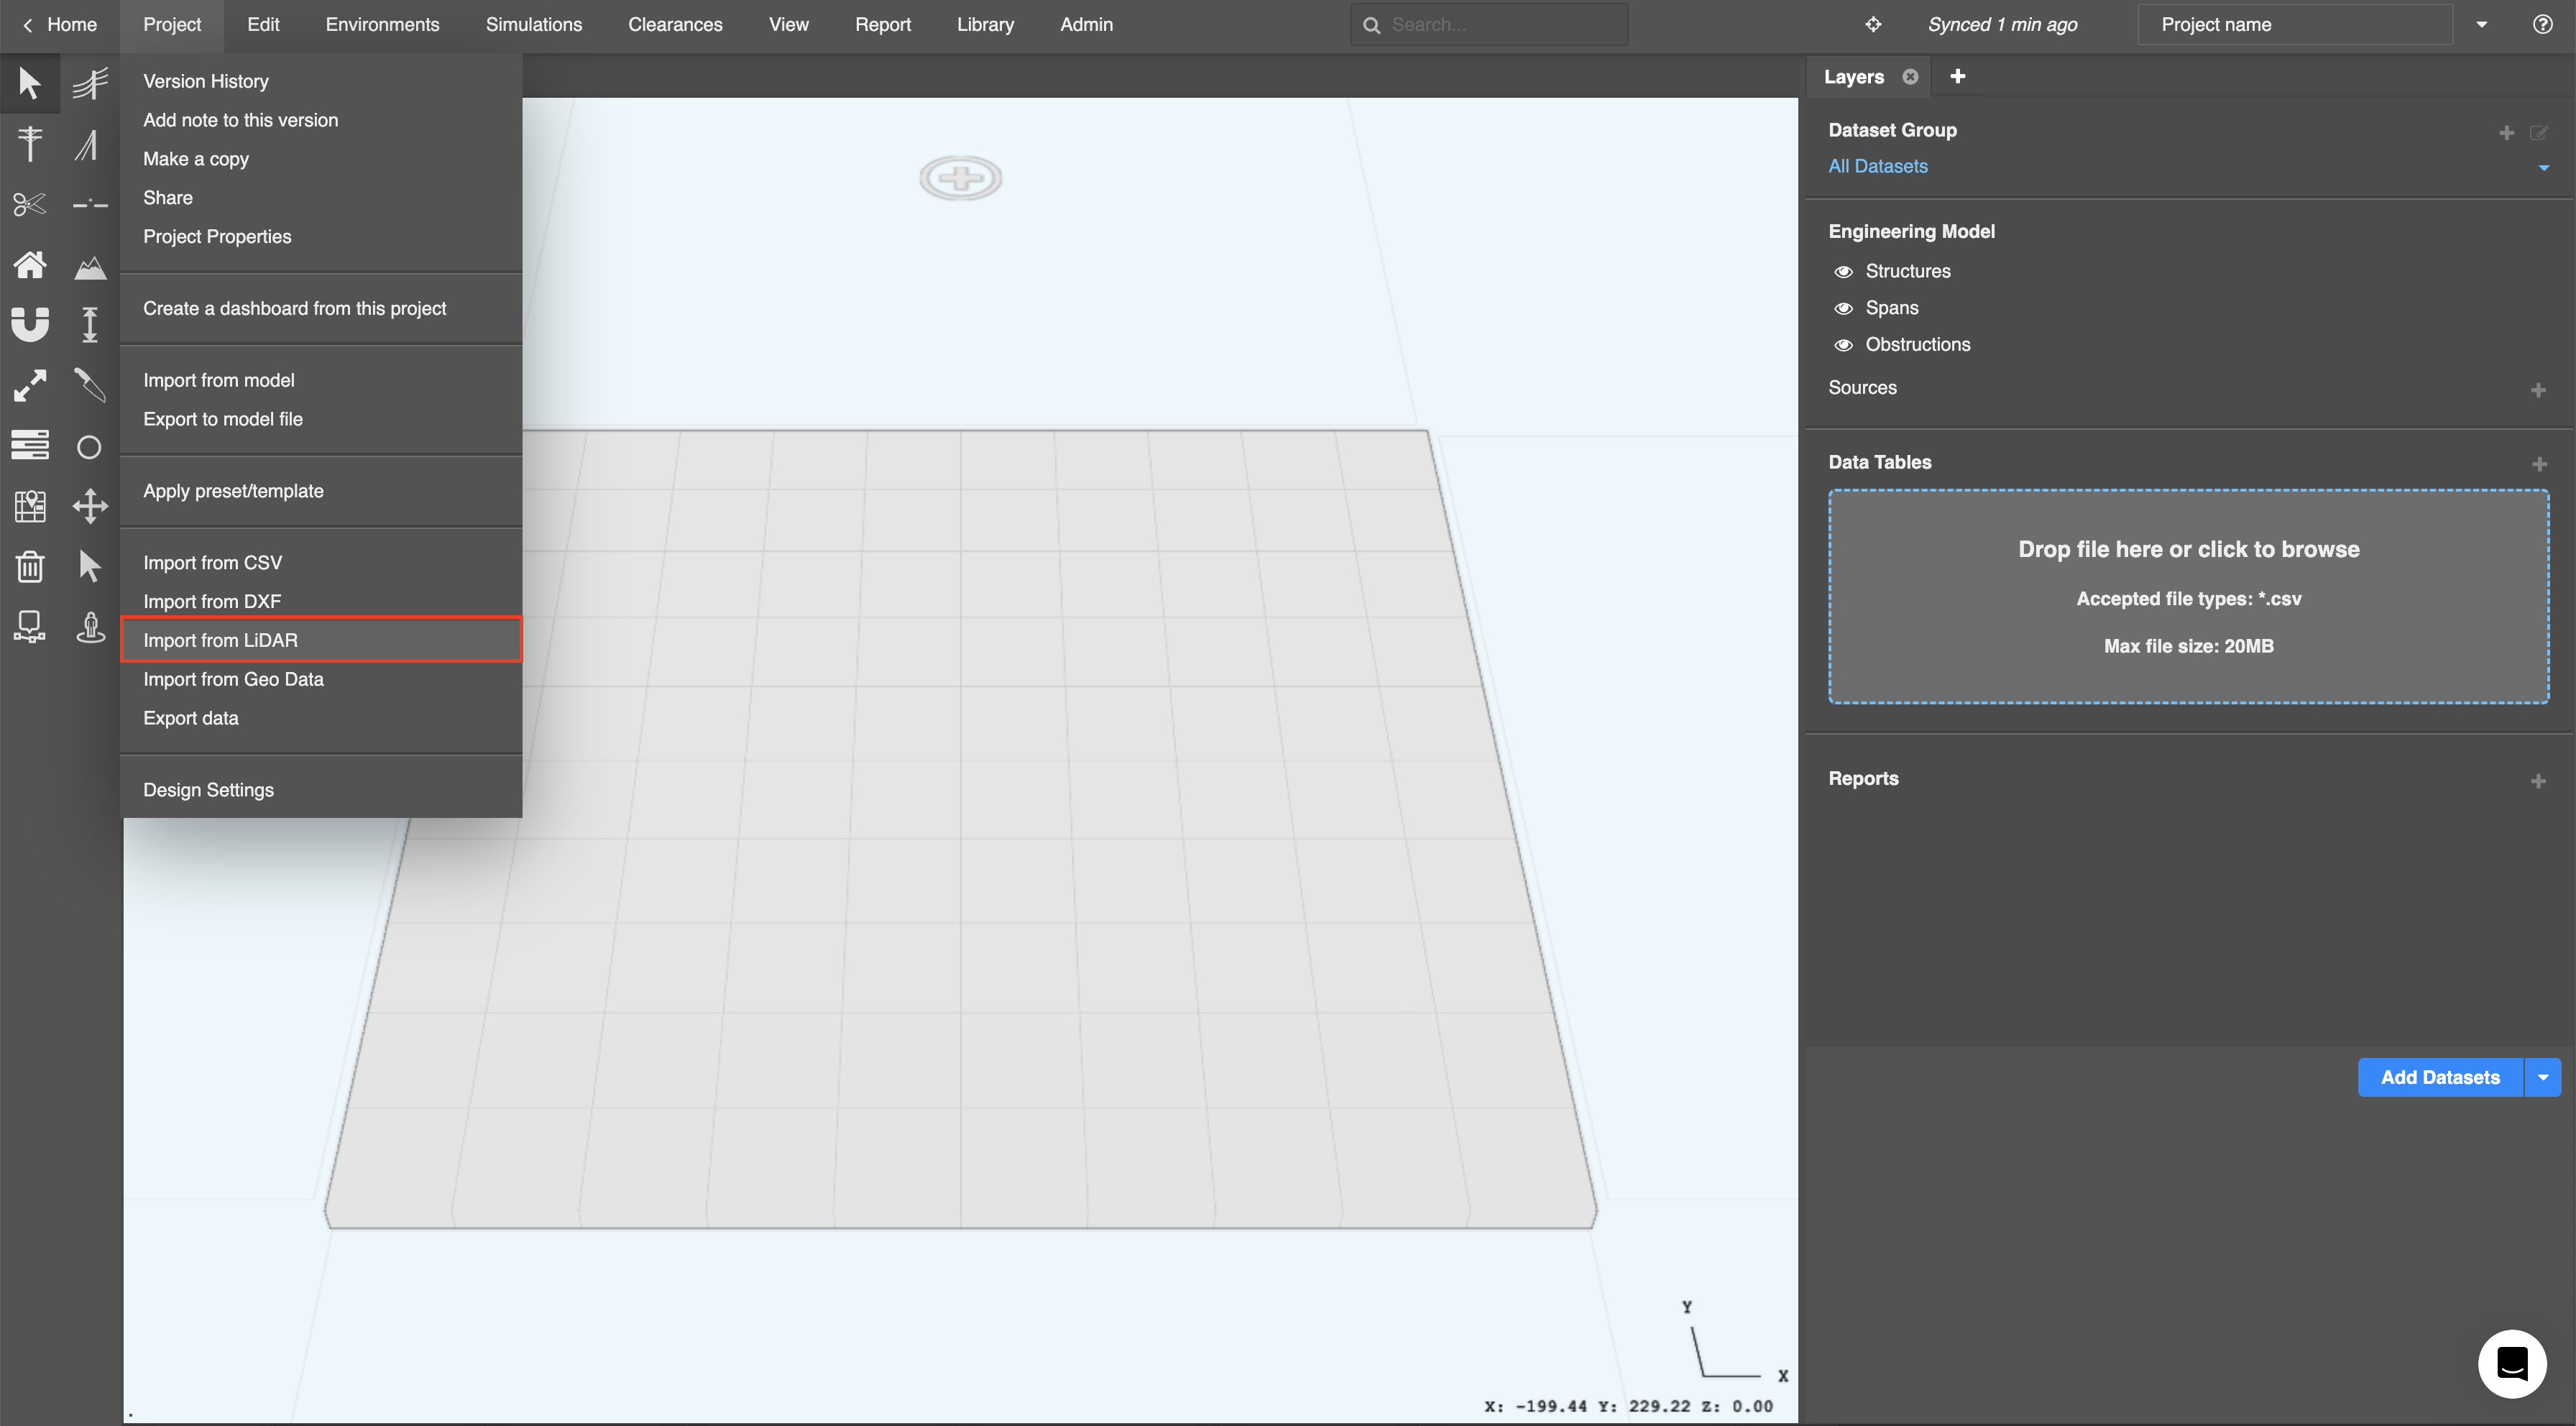
To open the Point Cloud Importer panel, click the Project menu and select Import from LiDAR from the dropdown.
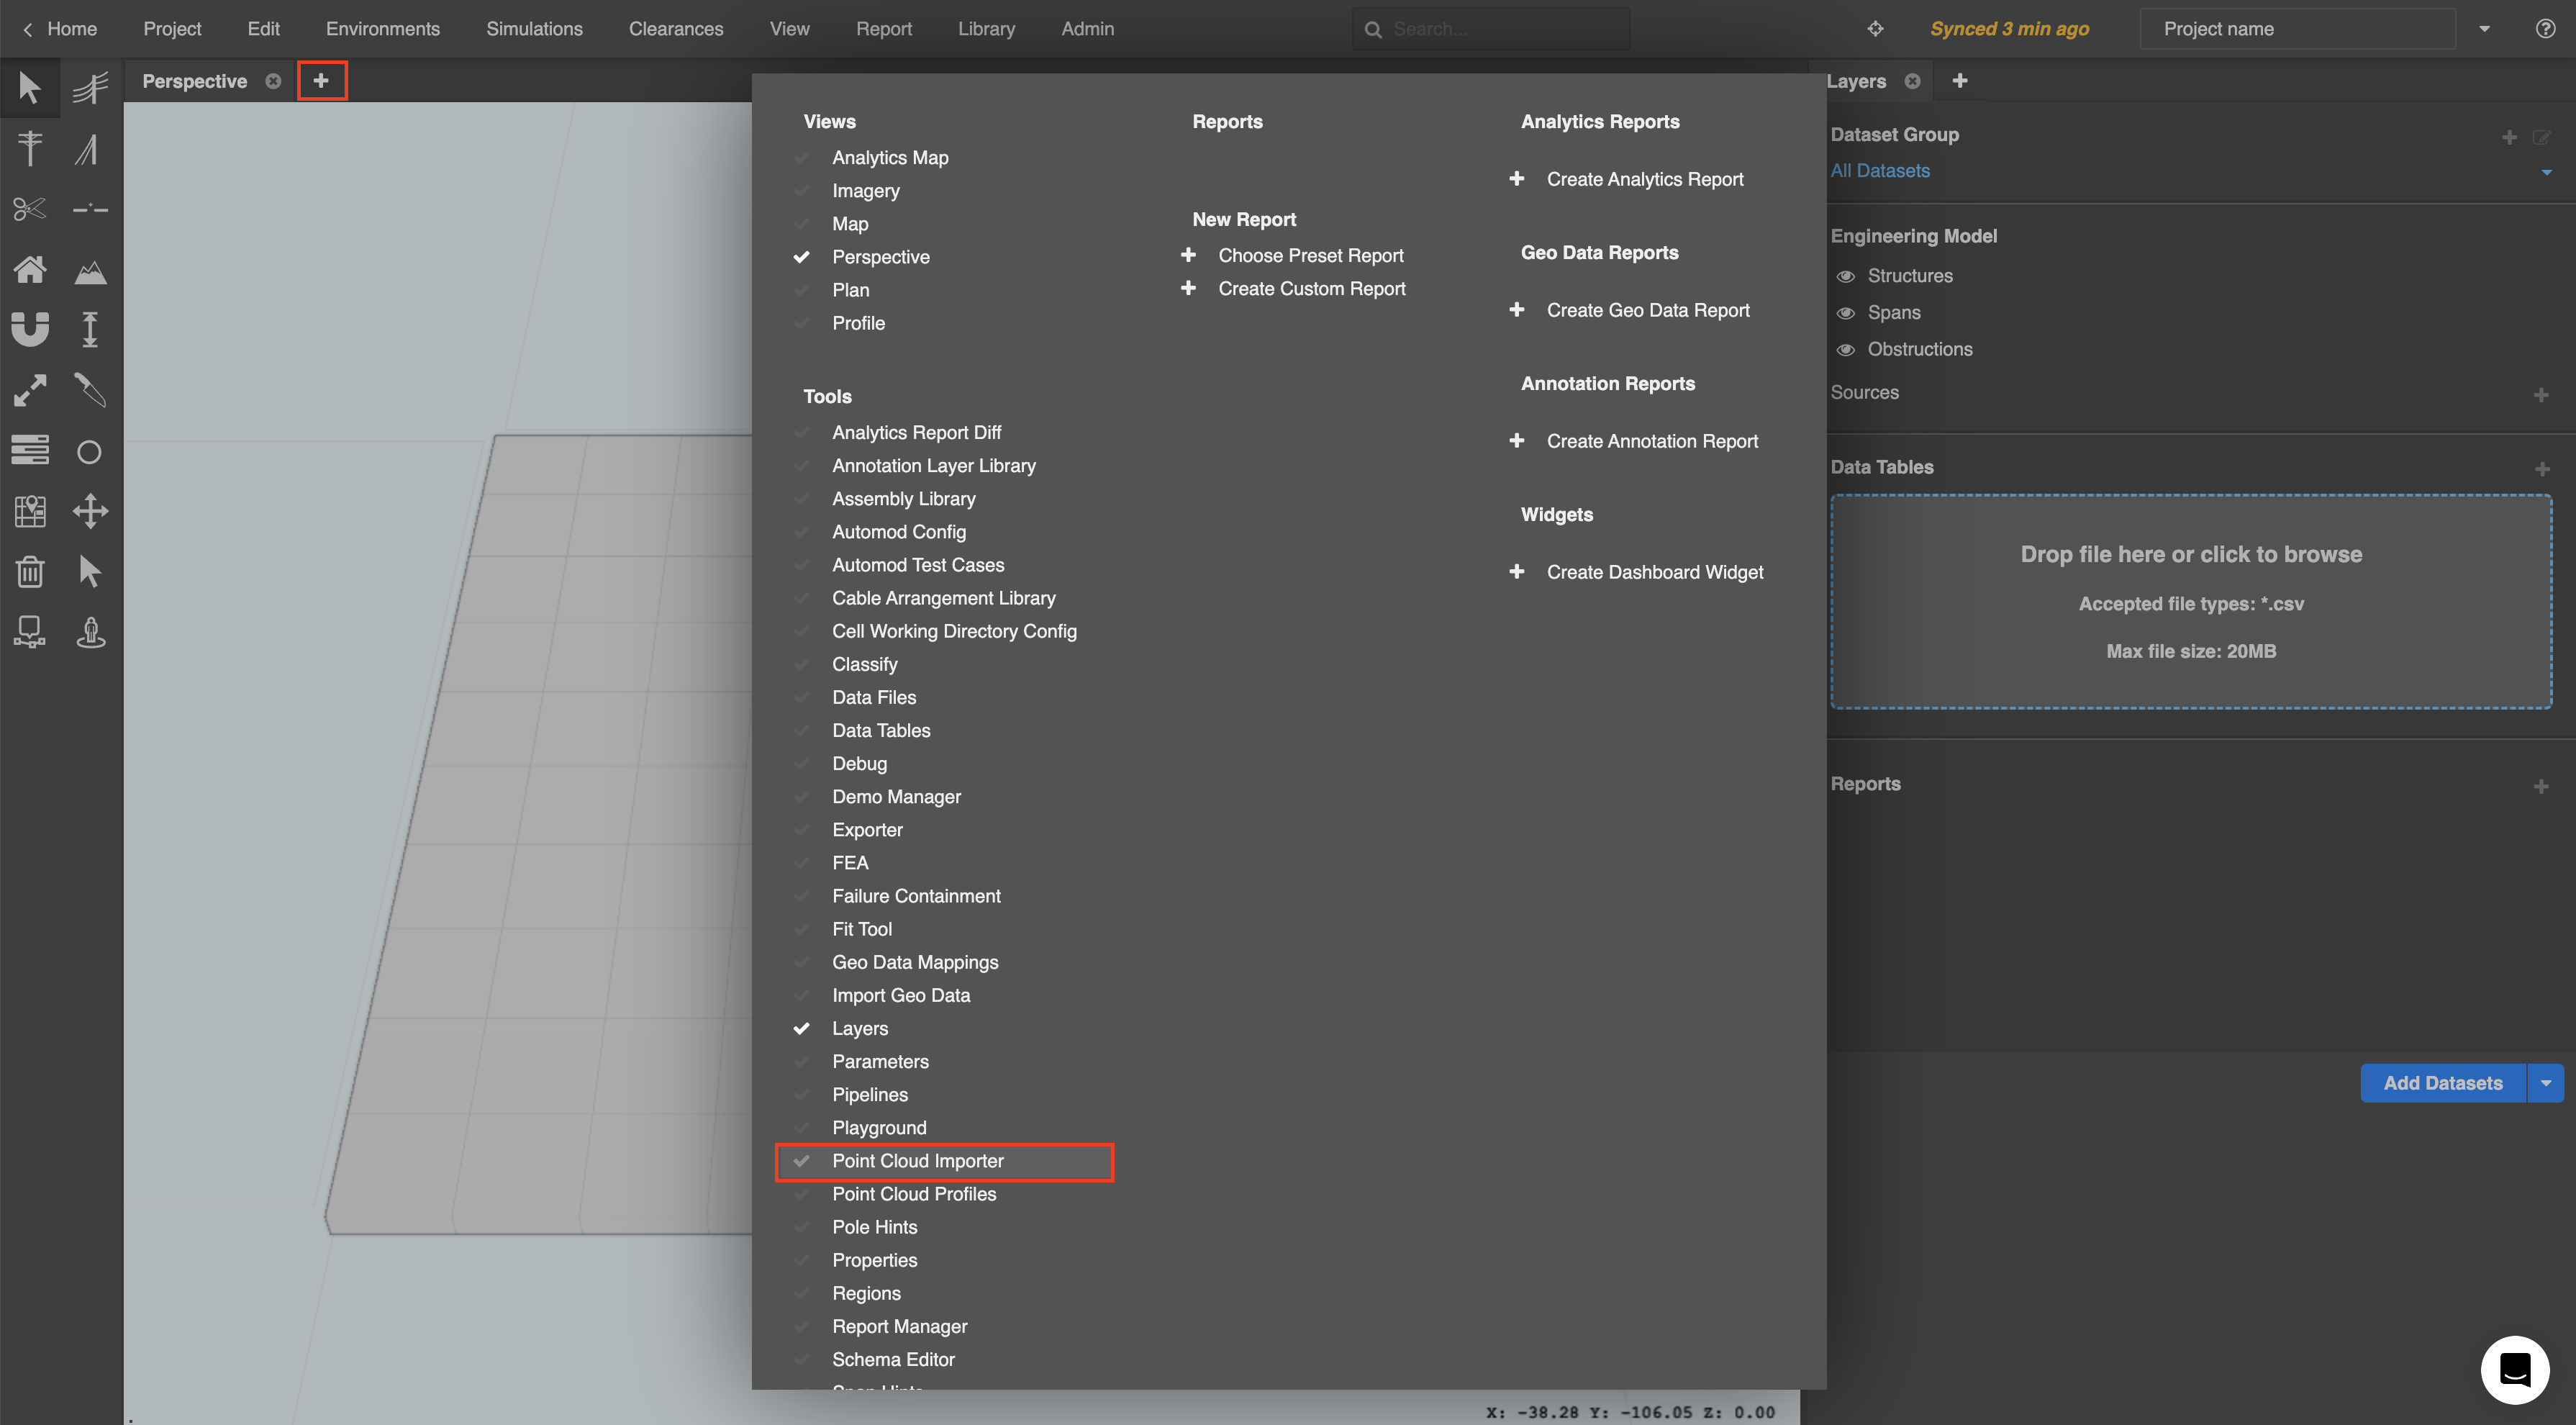
Alternatively, click the (+) button at the right hand end of the tabs in any section of the workspace, and select Point Cloud Importer under the Tools section in the popup:
The panel will appear as shown below. You may find it useful to move or dock the panel onto one side of your workspace:
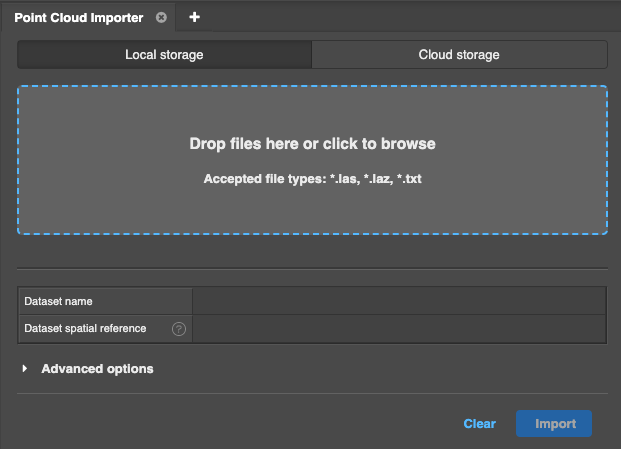
Uploading LiDAR data files
The Point Cloud Importer allows you to upload LiDAR data stored in .las or .laz format files.
There are two sources from which you can import LiDAR - your device, or connected cloud storage. If you have access to multiple sources, you can switch between them by clicking on the Local storage or Cloud storage tab respectively. Note that you can only import from one source at a time.
From your device
Under the Local storage tab, drag and drop one or more LiDAR data files (.las, .laz file formats) from your device into the box area, or click the box to browse for the files on your device. After the files are uploaded they will appear in the Selected files list:
Previewing LiDAR data in files uploaded from a device
Neara will automatically show a 3D preview of the LiDAR data in the uploaded files, inside the Perspective view. If you upload multiple files, the first file will be previewed.
To preview LiDAR data from the other uploaded files, expand the Advanced options section of the panel, and select a different file from the drop-down under the Preview section:
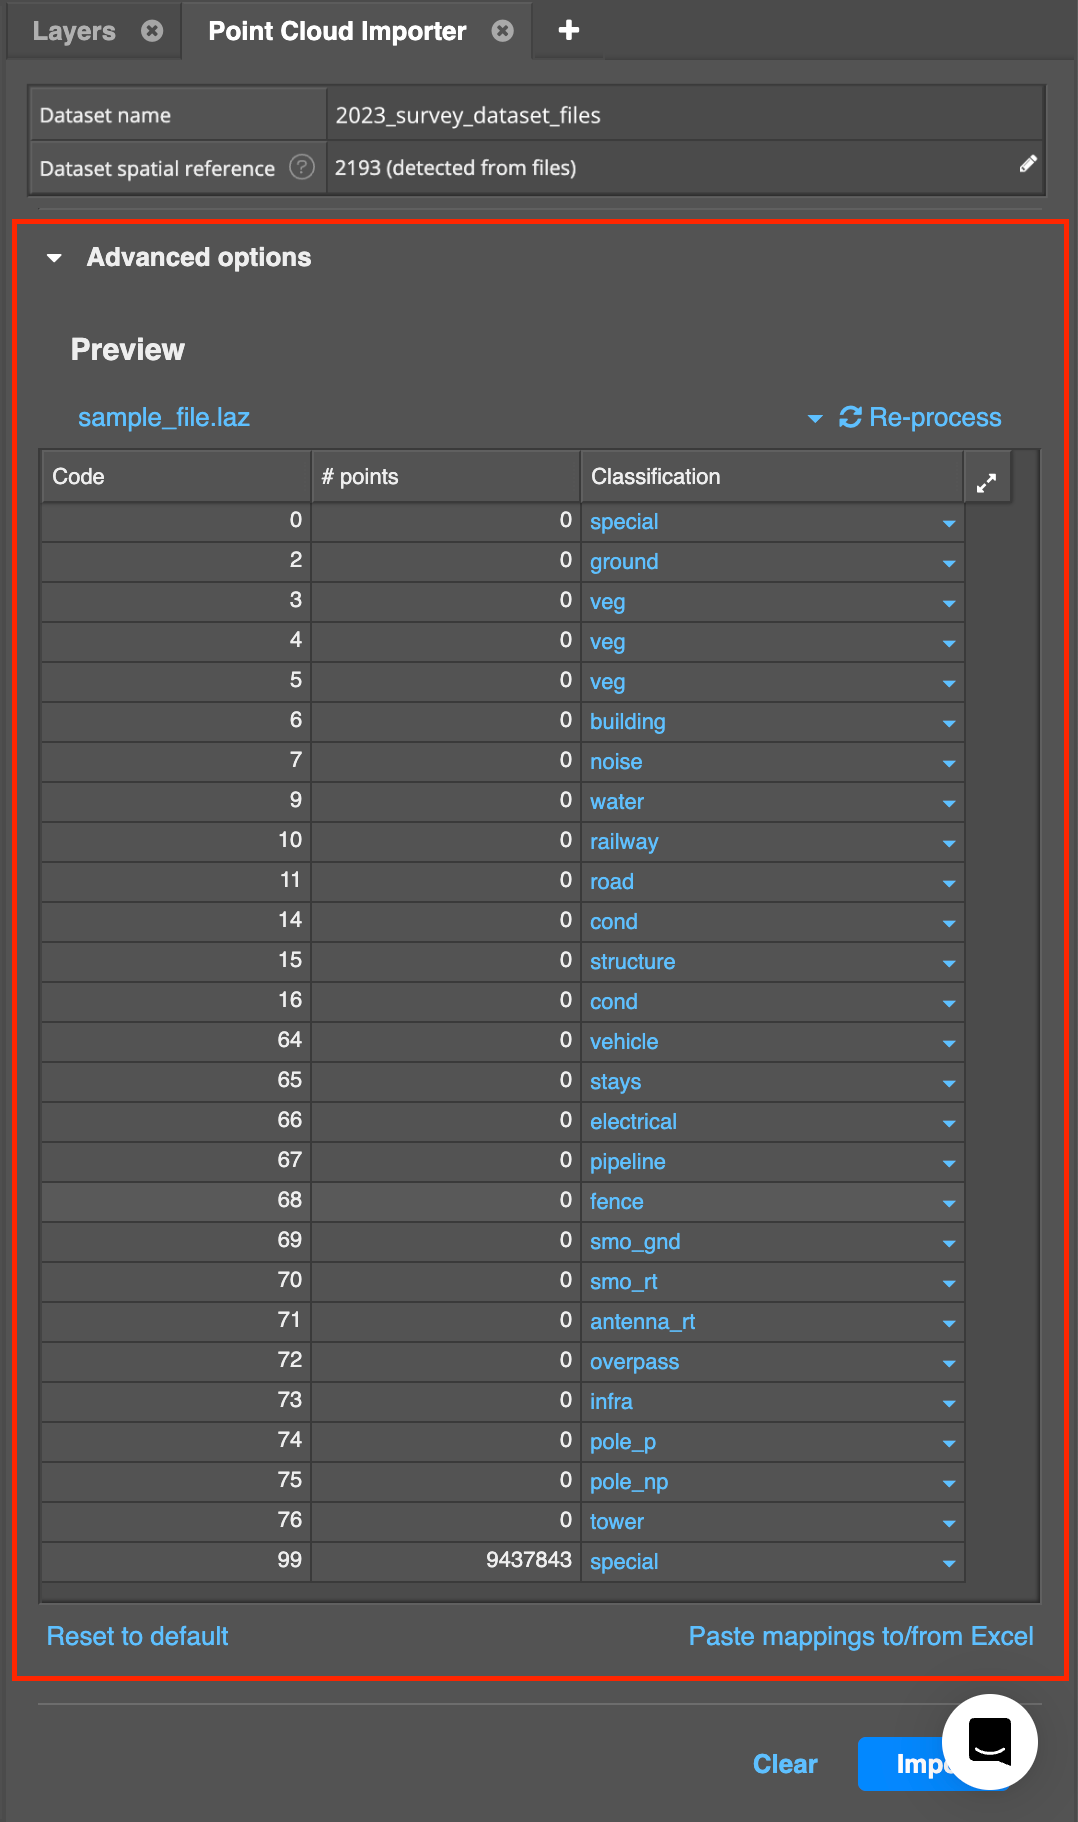
When importing from a file uploaded from your local device, you can also view the number of points by classification code under the Advanced Options section of the Importer panel:

To remove files from the Selected files list, click the Clear button.
From cloud storage
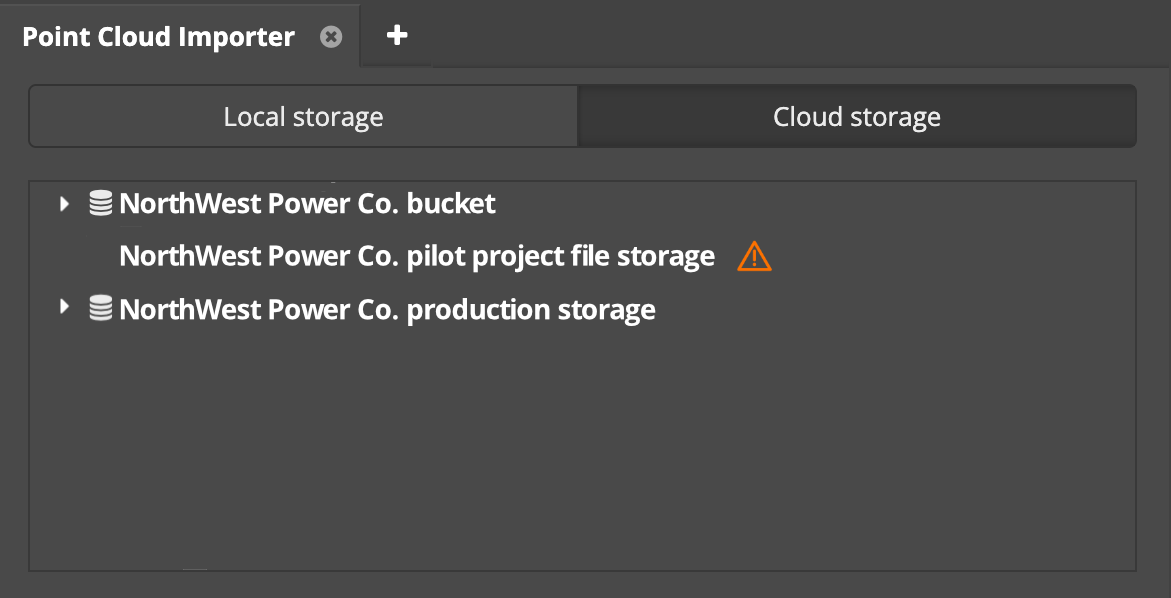
If you have a connected cloud storage location connected to your Neara account, its folders will appear under the Cloud storage tab:
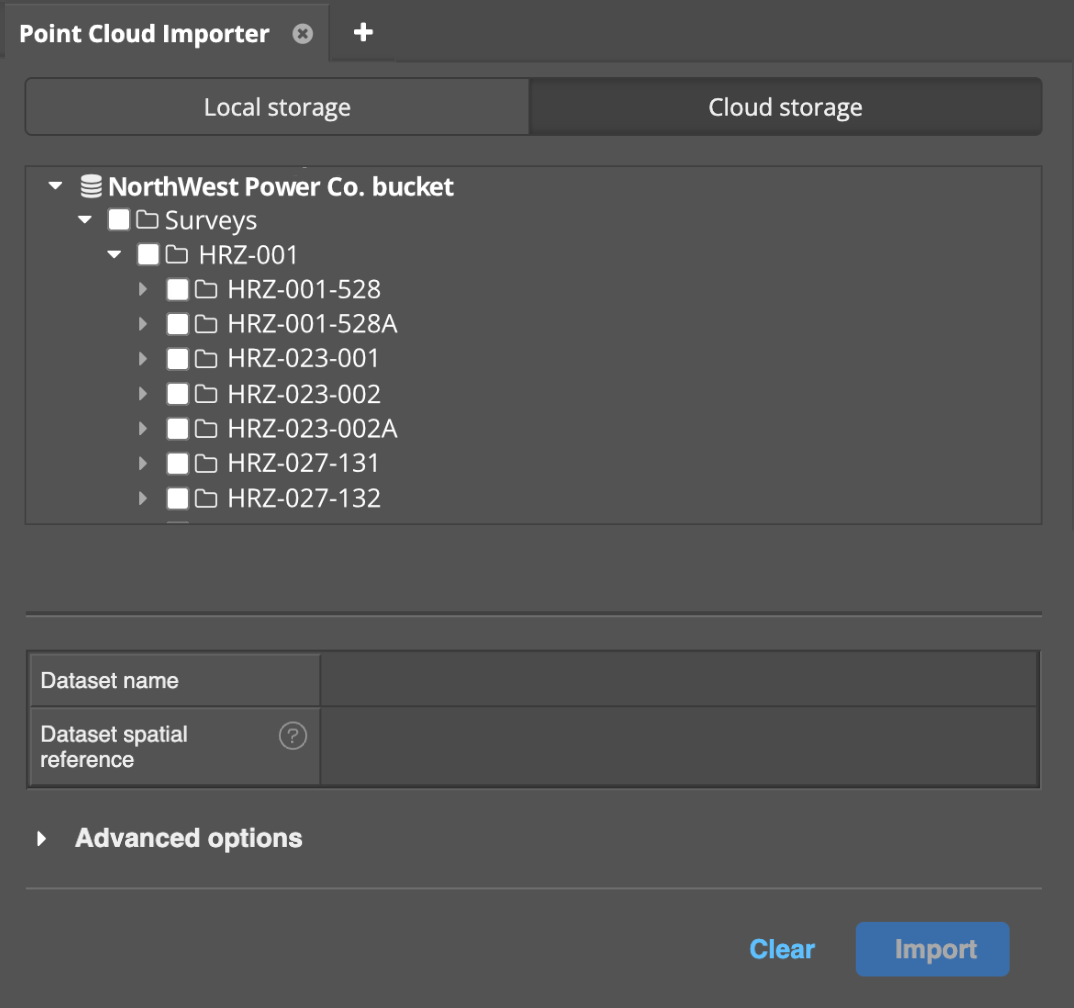
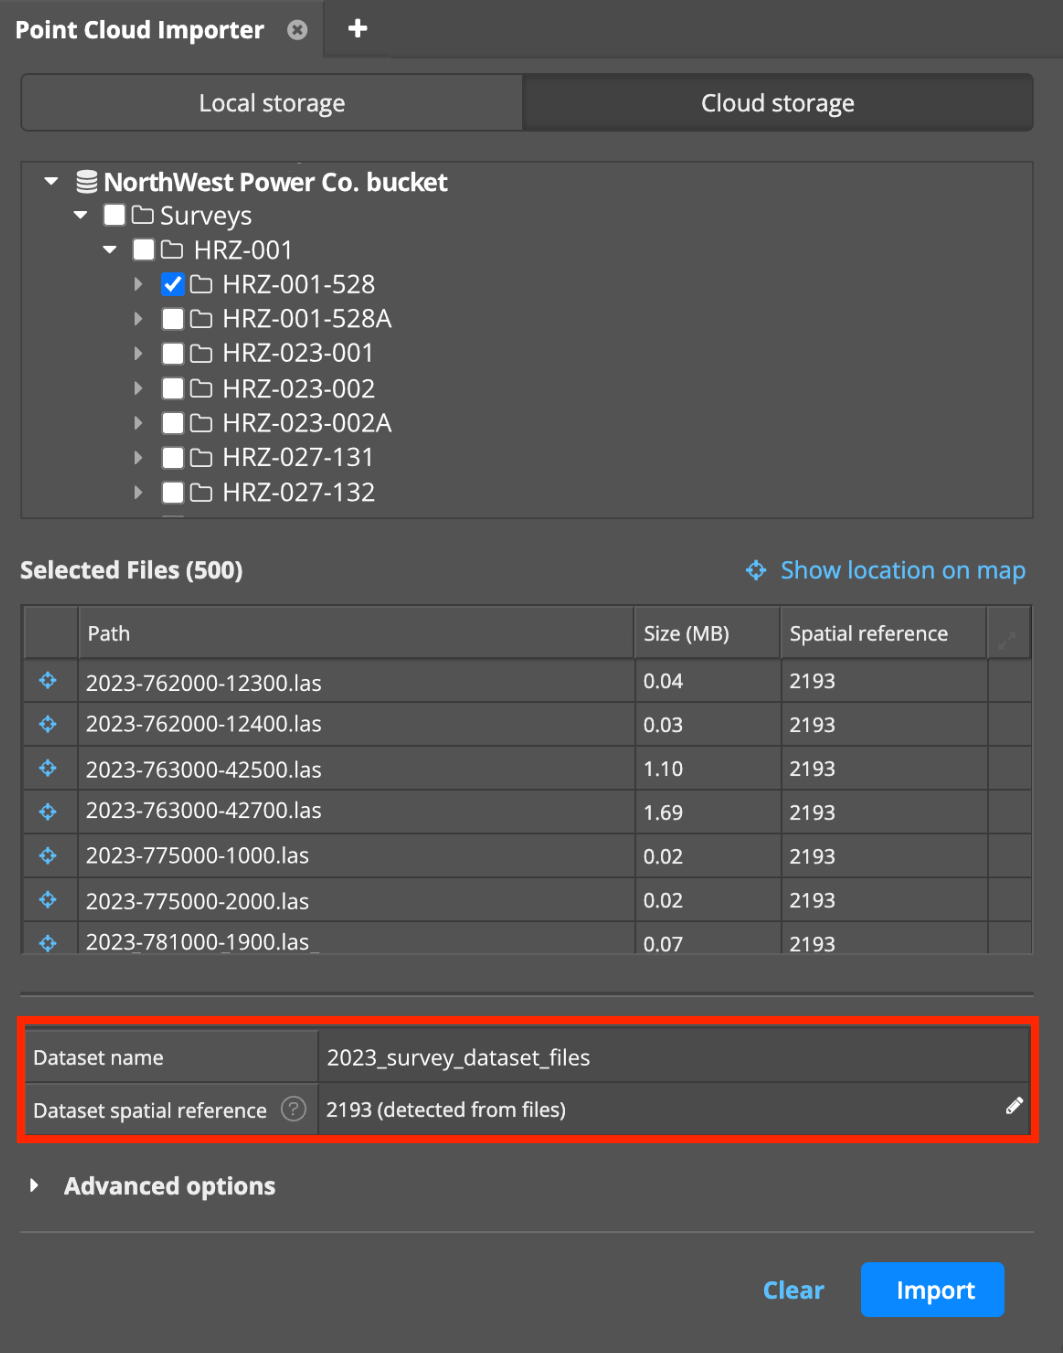
Place a checkmark next to each folder that contains the LiDAR data files to be imported.
The Neara Cloud Storage browser does not support browsing cloud folders with a single forward-slash (/) or double forward-slash (//) in the folder's name
You may have access to multiple cloud storage locations, depending on your account configuration. Each will be shown in the list.
If there is a problem accessing the contents of a cloud storage location, a warning icon will appear next to it after you have clicked on it - if this occurs contact our Customer Success team for assistance with updating your cloud storage configurations:
Once Neara has retrieved and reviewed the files, they will be added to the Selected files list. To remove files from the Selected files list, click the Clear button.
Previewing cloud storage -based LiDAR data
LiDAR data in files imported from a connected cloud storage folder is previewed in a slightly different way to those uploaded from a device.
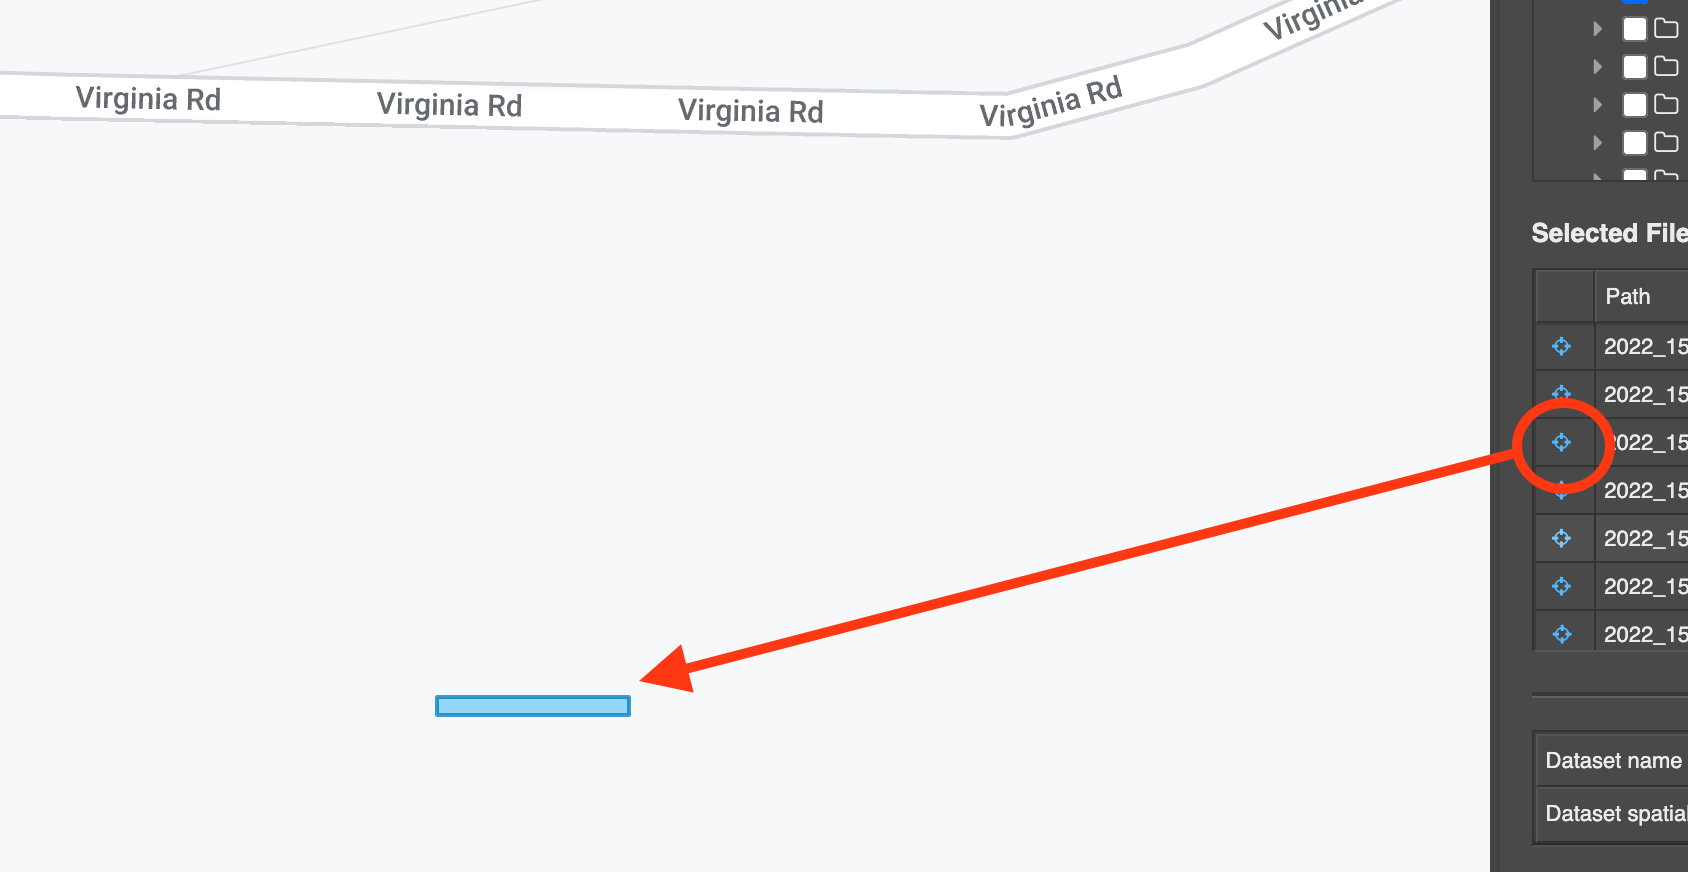
To preview LiDAR data from files selected from cloud storage, select the Show location on map option:

The Analytics Map will open and display a region that contains polygons showing the LiDAR data's geographic bounds for each of the selected files. If you have selected a lot of files, or they represent captures over a large area, you may need to zoom in to see each polygon:
To quickly zoom in on a polygon for a specific file, click the Show location icon to the left of the file name in the selected files list:
Dataset options
The import process will create a new Dataset in your Neara project using the LiDAR data from the selected files.
The new dataset's name is automatically suggested from the name of the first LiDAR file in the selected files list. It can be manually changed if required in the Dataset name field.
If the selected files have spatial references, the new dataset's spatial reference is automatically set with the EPSG code detected in the first file processed, and if necessary you can change it in the Dataset spatial reference field. Note that if the selected files each contain different EPSG codes, it may lead to unpredictable import and preview results:
Advanced options
In the Advanced options you can preview or modify the point cloud classification mappings before completing the import process.
For convenience you can copy/paste existing mappings to and from Excel by clicking the Paste mappings to/from Excel option at the bottom of the panel.
Unlike import from a file uploaded from your local device, when you select a file to import from a cloud storage bucket Neara does not display the number of points for each classification code in the imported file until after the data has been imported:
Importing
When ready, click the Import button to begin the import process and create the new Dataset in your project from the selected files.
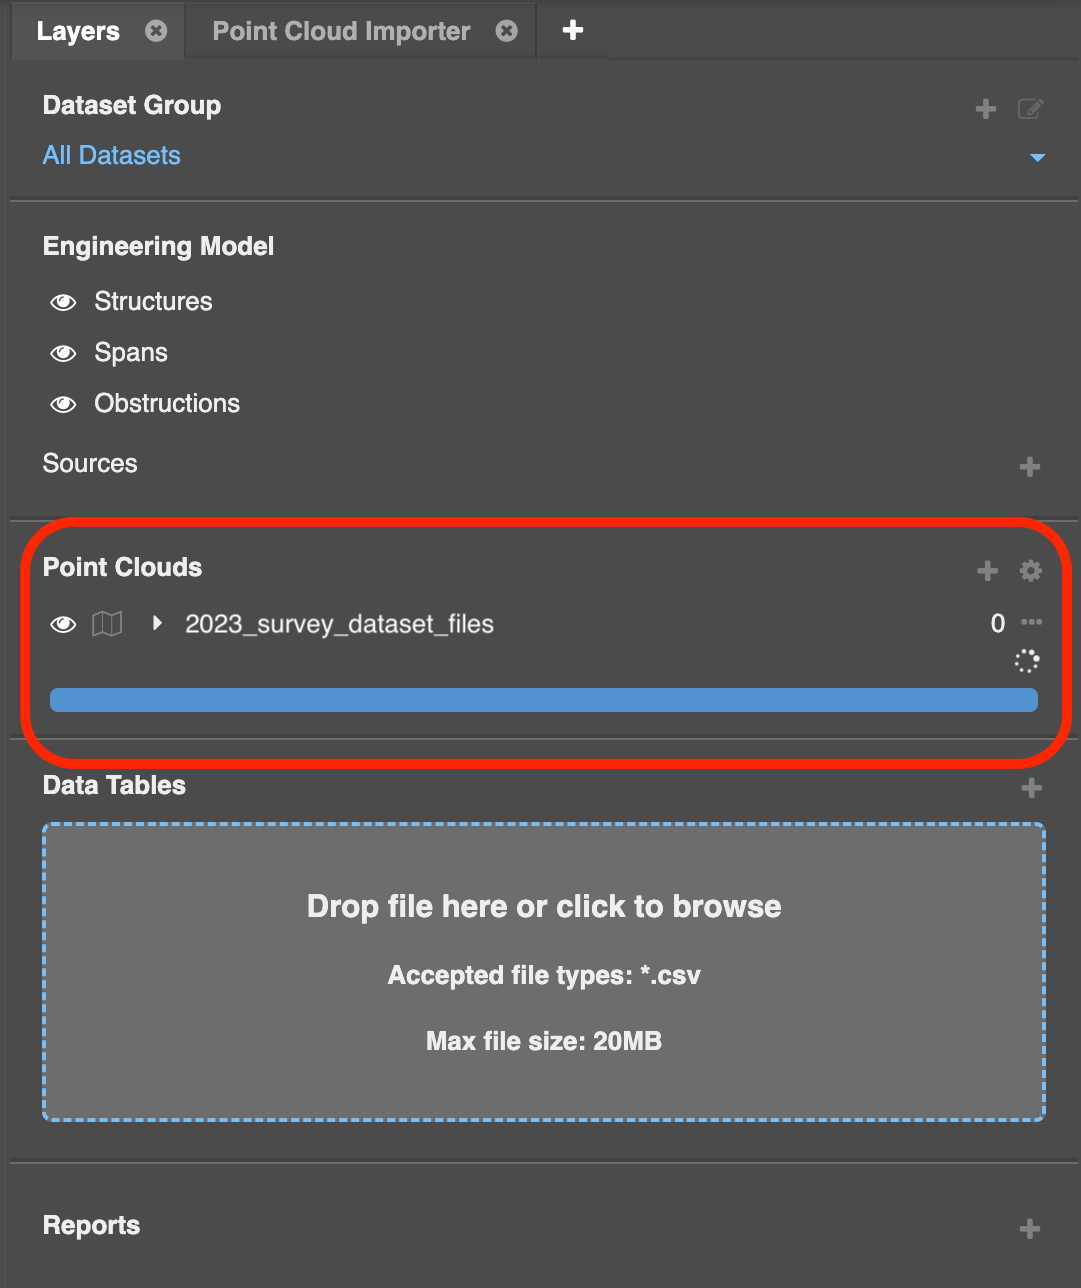
Import progress for the new dataset is displayed in the Point Clouds section of the Layers panel:.
To open the Layers panel, click the (+) button at the right hand end of the tabs in any section of the workspace and select Layers under the Tools section in the popup.
Cancelling an import
To cancel the import, hover over the dataset's progress bar on the Layers panel and click the Cancel (x) icon. You will be prompted to confirm:
Progress status colors
During import the progress bar on the Layers panel will display different colors:
- Preparing resources: animated / hashed grey bar that indicates Neara is preparing computing resources and processing has not yet started,
- Processing: blue bar that indicates import processing is underway. As processing continues, you will notice portions of the blue bar turn yellow and green. The yellow portion of the progress bar indicates the portion of processing currently in-flight, and the green portion of the progress bar indicates the portion of processing that has completed.
- Complete: a solid green bar that indicates the import process is complete.
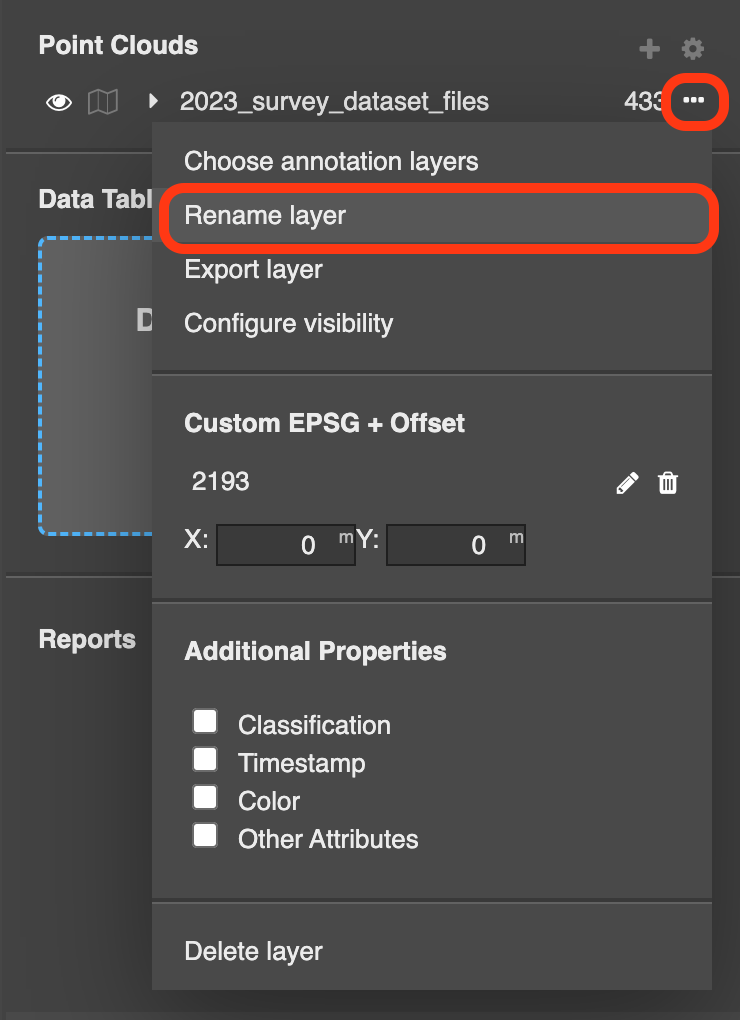
Renaming the dataset
Once the import is complete, to rename the imported dataset click the action (…) menu to the right of the dataset's name in the Layers panel, and choose the Rename layer option:
Previewing the imported dataset
Once the import is complete you can preview the LiDAR data in the imported dataset. First, click the Toggle map vizualisation icon to the left of the dataset's name in the Layers panel:

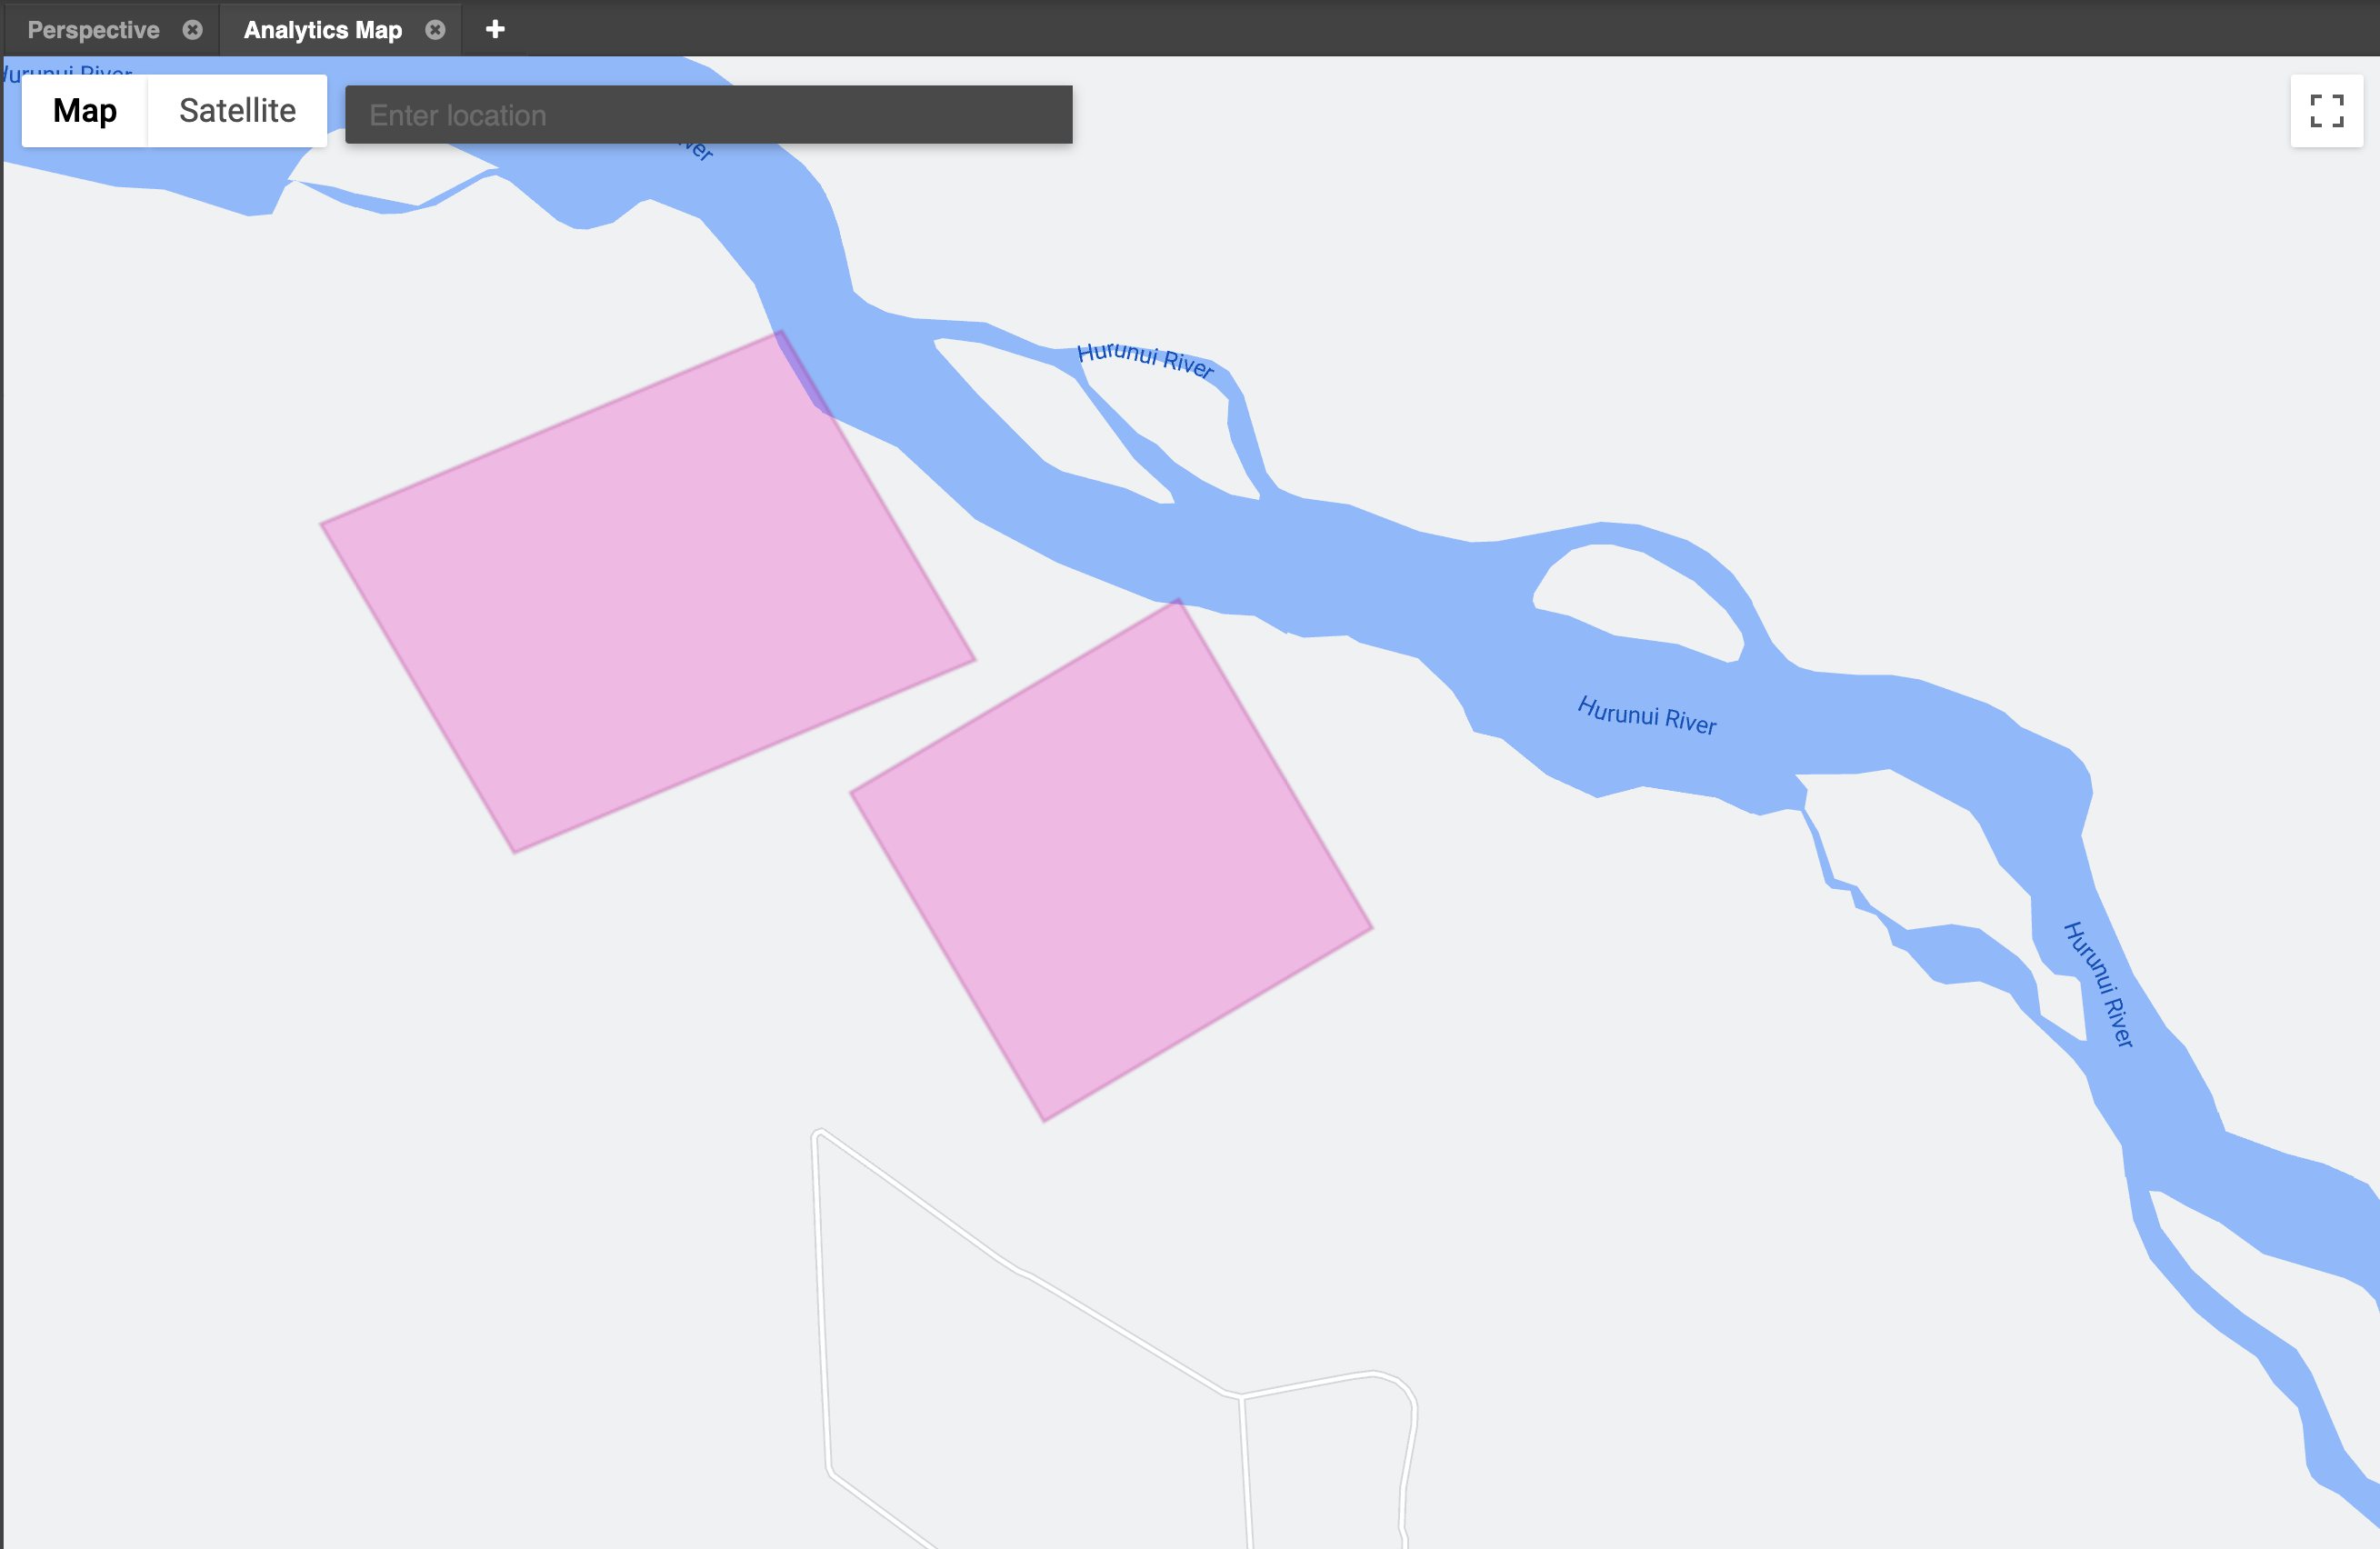
Polygons indicating the area containing LiDAR data will be shown on the Analytics Map panel (If the Analytics Map is not open, click the (+) button to the left of any group of tabs and select Analytics Map from the popup):
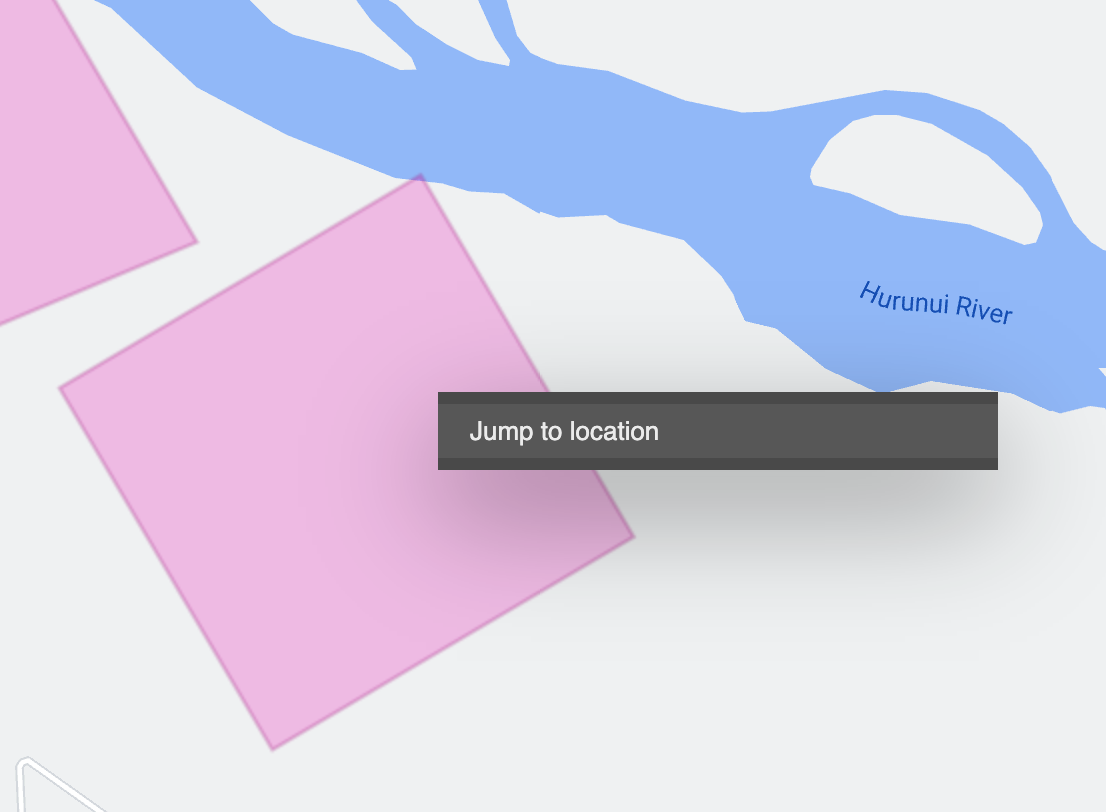
Right-click on a polygon, and select Jump to location on the popup menu:
The location will load into the Perspective view automatically.
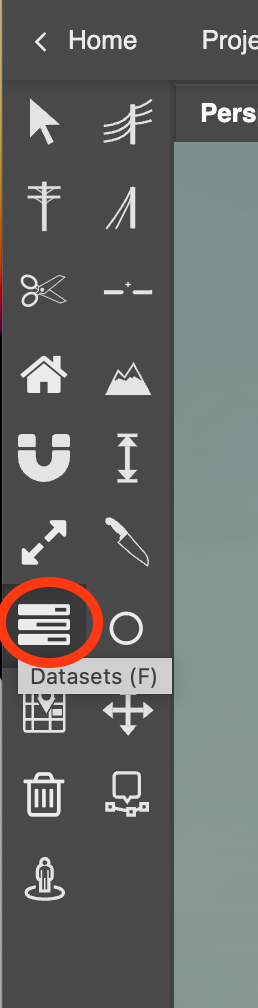
For performance reasons, data in a dataset does not usually automatically load into the Perspective view. If you do not see the LiDAR data in the Perspective view after jumping to the polygon's location, use the Datasets tool to manually load it - click the Datasets tool on the toolbar:
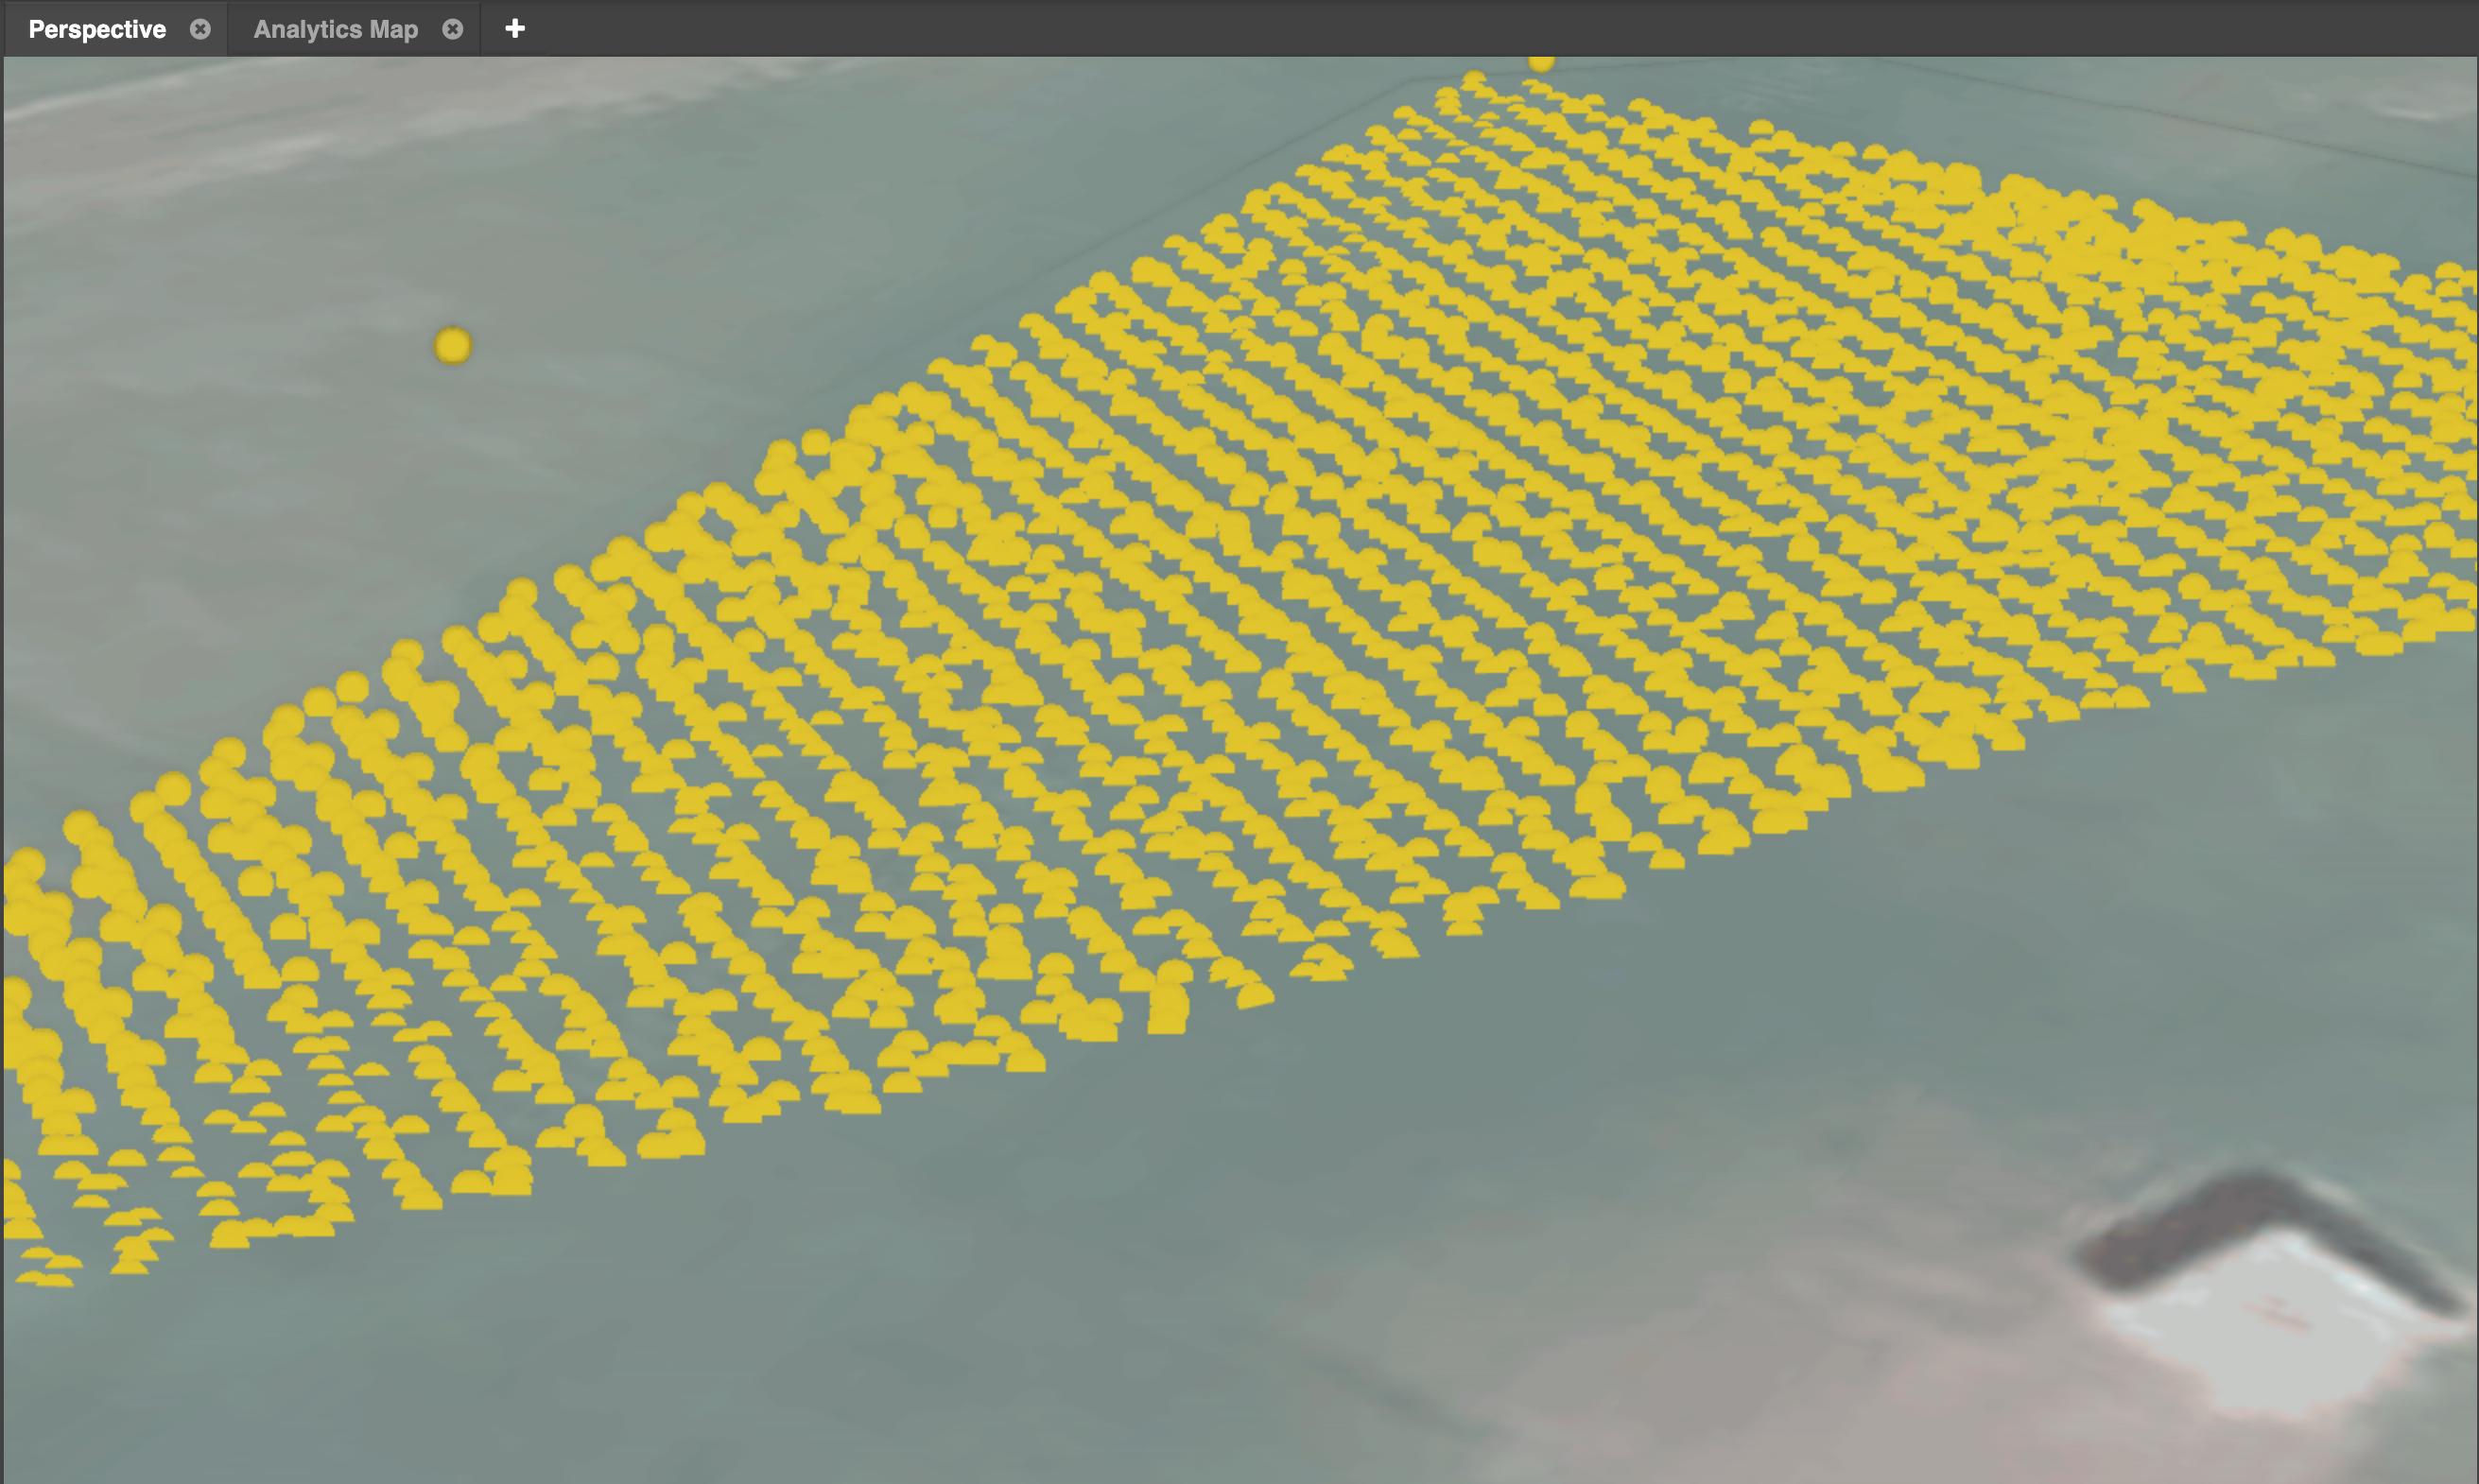
Click on the Perspective view to load the dataset's data into the selected area. The jump to location action may have loaded the Perspective view zoomed closely in so it might help to zoom out to see the loaded LiDAR data. You can also modify the view settings to increase the size of the points for clarity:
In the next step, we'll classify this LiDAR data.